Deferred Renderer
The Deferred Renderer is the default, pbr-based renderer that most users will use. This renderer uses the attributes of pbr found on materials to create the final scene we see in the game. The renderer can be found as a component of the default object named "Renderer" in the Objects window. It also utilizes bloom.md and Screen Space Ambient Occlusion if the two components, name=bloom and name=SSAO, are found on the same object. The DeferredRenderer has the {nav name=[RunInEditor]} attribute on its class, so the renderer can be used in the level editor.
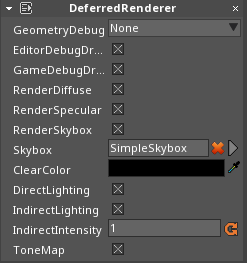 DeferredRenderer component
Deferred Renderer UI Overview
GeometryDebug drop-down menu: Draw one of the properties used in the final target instead of the final target itself. Depending on the given property, it's value at each fragment is used as the color.
- None: Draw the final target.
- Normal: The surface normal in world space.
- Depth: The distance to the camera.
- Roughness: The roughness value from the texture.
- Albedo: The albedo value from the model's texture.
- Metallic: The metallic value from the model's texture.
- Specular: The specular value of the model.
EditorDebugDraw checkBox: Toggle adding debug drawn content to the final render in the editor.
GameDebugDraw checkBox: Toggle adding debug drawn content to the final render in the game session.
RenderDiffuse checkBox: Toggle the diffuse light on a fragment.
RenderSpecular checkBox: Use the specular light on a fragment.
RenderSkybox checkBox: Toggle drawing the skybox.
Skybox texture: A texture used as the skybox for that renderer.
ClearColor : The color to draw before the skybox.
DirectLighting checkBox: Toggle applying lighting from light components.
IndirectLighting checkBox: Toggle applying image based lighting from the Skybox.
IndirectIntensity : A multiplier for the ammount of indirect lighting to apply. In general, this value should remain in the range
[0,1], where0means to use no indirect lighting, and1means to apply all of it. ToneMap checkBox: Toggle applying tone mapping.
Forward Renderer
The ForwardRenderer is similar to the DeferredRenderer, except the forward renderer only supports a maximum of one directional light. There's a performance gain when switching from deferred to forward rendering, and it comes from reducing the number of render passes. Not only will one light be taken into consideration when rendering, but lighting is computed in the same render pass that a {icon university}[[zilch_engine_documentation/zilch_editor_documentation/zilchmanual/graphics/models/model_component/|model's]] geometry is computed. In addition, there is no GeometryDebug drop-down menu on the ForwardRenderer since there's no geometry pass.
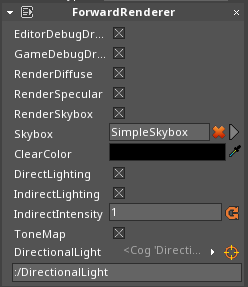 ForwardRenderer Component
Forward Renderer UI Differences
DirectionalLight cogPath: A cogpath to the one directional light that the ForwardRenderer will use.
Debug Drawing
Every render task that shares the DebugRenderGroup is associated with some debug drawing feature of the editor, such as the grid or translation arrows. These are the types of features that are toggled with DebugDraw checkBox.
Normal
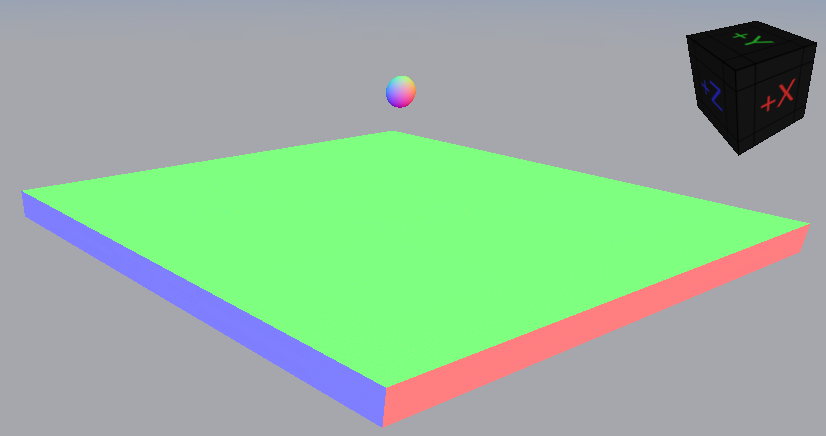
Geometry Debugging allows the user to view certain values in the deferred renderer pipeline. When troubleshooting issues relating to lighting, one may wonder if the vertex normals of a model are applied in the way they intended, or if the normal map was applied correctly. In this case, one would want to set GeometryDebug drop-down menu to Normal, which associates the world normal of a point on a surface with a color, and so green is upwards, red is in the positive x direction and blue is in the positive z direction. Each of the three colors are also found on the view cube in the same directions.
Depth
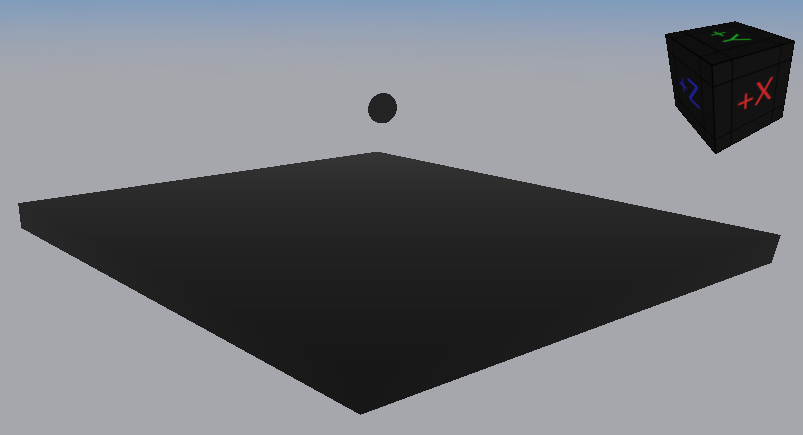
The Depth option uses the z value in view space as the red, green, and blue components. This means the resultant color will be a grey scale value, where brighter fragments are further from the camera. This can be useful when looking for changes in depth and whether the transition is smooth or instant.
Other Texture Maps
Each fragment on a surface samples from a texture to get Albedo, Roughness, or Metallic values. Each of these properties can be debug drawn using GeometryDebug drop-down menu.
Diffuse and Specular Light
When analyzing how light bounces off a surface, we can categorize the light as either diffuse or specular. Each photon on it's own follows one behavior or the other, but when many photons hit a surface, we view the surface as a weighted distribution of specular and diffuse. These properties aren't directly edited, but are a result of the other PBR material inputs. Specular light refers to photons that reflect off a surface. Diffuse light is scattered off a surface in every direction, a result of subsurface scattering. Both of these elements can be enabled and disabled with ShowDiffuse checkBox and ShowSpecular checkBox
Direct and Indirect Light
Indirect Lighting comes from using Image Based Lighting on the skybox in the scene. The skybox is a background texture, defined by Skybox texture, that wraps around the world. It represents things that are so far away, that they are only effected by rotation of the camera, and not translation. For example, if you see a mountain in the distance, looking downwards causes the mountain to move up with respect to you. If you sidestep to the right, the mountain remains static.
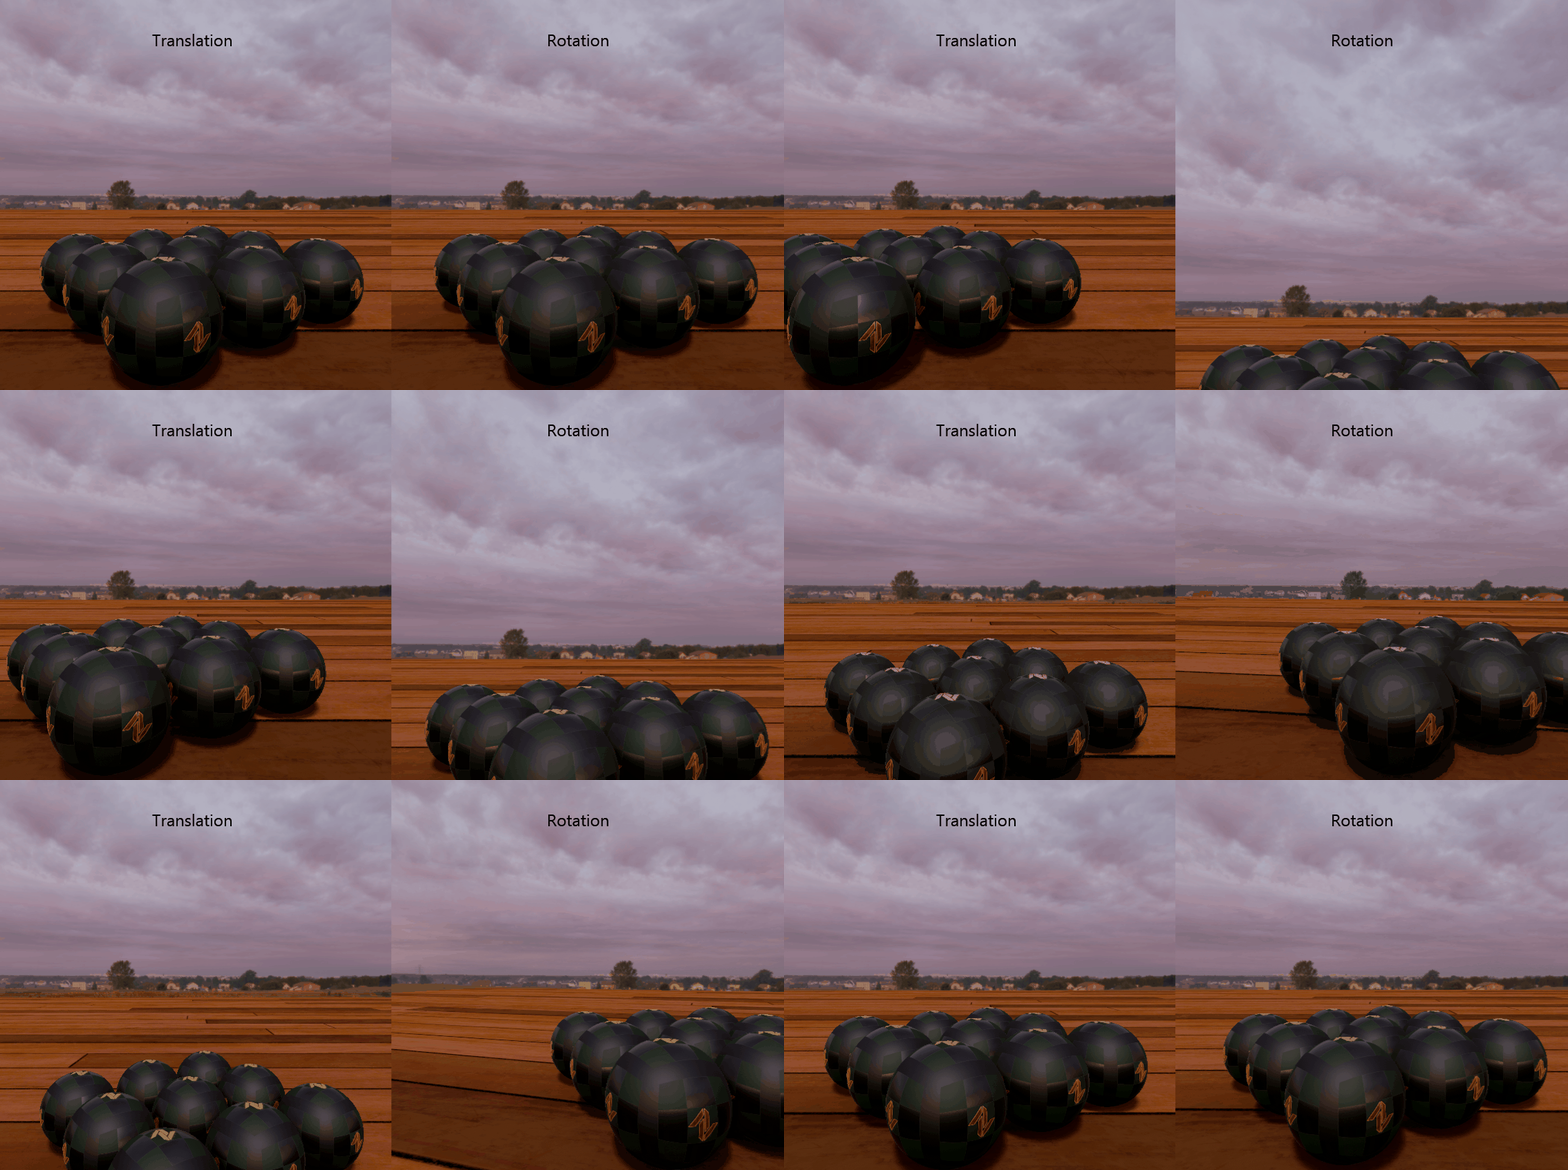
Direct lighting is the light that comes from every other light in the scene.
Both direct and indirect lighting can be enabled and disabled using DirectLighting checkBox and IndirectLighting checkBox. Disabling DrawSkybox checkBox will remove the skybox from the final render, but won't remove the effects of indirect lighting. IndirectIntensity defines the amount of indirect lighting summed into the final render.
Tone Mapping
Tone mapping uses a function to take a color value and remap it to a new value. It's a technique that's often used to emphasize the brightness of a fragment. Light is added together linearly, so if two lights each give a color value of 0.5 to a fragment, the resultant fragment will have a color value of 1. The problem with linear lighting, or lighting without tone mapping, is that the resultant color is clamped. The same two lights might give a different fragment a color value of 0.75 each, and yet the resultant fragment will still have a color value of 1.
Using tone mapping, we convert our linear light into a gamma range. Small color values remain about the same, while large color values approach 1 without ever reaching it. This is realistic, as no light is 100% bright. Tone Mapping can be enabled and disabled using ToneMap checkBox.