The Animator allows one to change the value of properties on components over time.
Why it exists
Animator allows one to custom build complex animations through the Zilch Editor using a graphical representation. Using the Animator, one can create multiple Keyframes (explained below) of a component's properties on a timeline to achieve complex animation.
These are some examples of the type of animation the Animator can do:
- Moving Platforms
- Day/Night cycles
- Flickering lights
- Opening doors
- Cinematic Events
- UI animations
- and more...
Opening the Animator
The Animator can be accessed by pressing the following button at the top of the Zilch Editor window:

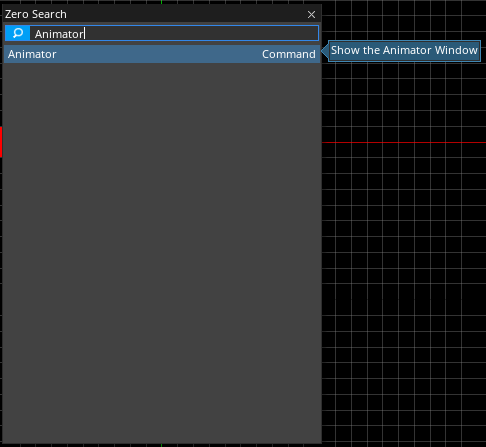
Alternatively, it can also be opened through the Zilch Search window:

Once it has been opened, a window will appear at the bottom of the Editor :

AnimationGraph Component
Before animating an object's properties using the Animator, the AnimationGraph component must first be added to that object. This tells Zilch that this object's properties are now able to be animated as well as how fast it should be played. The AnimationGraph component is added to an object the same as any other component or by clicking on the highlighted text at the bottom of the screen:

NOTE: "No Object Selected." If the Animator shows No Object Selected instead of Click to add Animation Graph, click on the object to be animated to proceed.
Adding an Animation
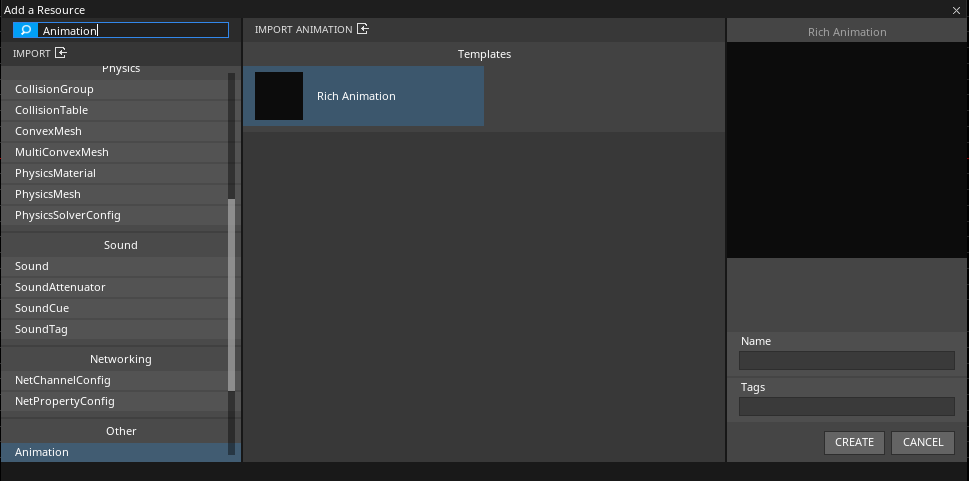
The last setup step is to create an Animation with the RichAnimation template. This can be done, through Zilch's Add a Resource window:

This can also be done by clicking on the highlighted text at the bottom of the screen:

The object should now have a new SimpleAnimation component.
SimpleAnimation Component
This component indicates which animation to associate with the object. From this component, the animation to play as well as the play mode of the animation can be chosen.
NOTE: Using Animation Since animation to play can be chosen through the SimpleAnimation Component, one can easily create an animation that works with multiple objects. Just add an AnimationGraph component and a SimpleAnimation component to the other object and select the animation to use.
Now everything is ready to start animating.
Keyframes
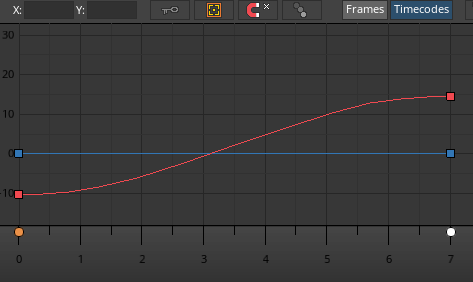
To begin animating, keyframes must be created. Keyframes tell the animation that, at a given point in time, a property should be set to a certain value. Between each keyframe, the Animator will create a curve that will interpolate the chosen property values between each keyframe.
To choose the property to keyframe, click on the  icon next to the property that should be animated. This will create a keyframe of that property, with its current value, at the time indicated by the Play Head (the vertical blue bar in the animation graph):

The Animator creates a curve interpolating between the two values. By repeating this, you can create multiple keyframe with the chosen time and value:

Next, the animation controls on the lower left corner will be used to play and see the animation in action.

Animation List
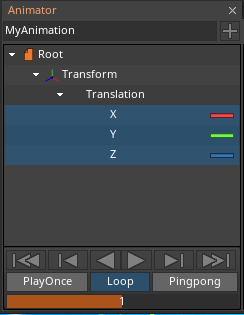
On the left-hand side of the Animator window window, the name of the animation that has been created can be seen. This location shows the current animation that is being edited along with the values being manipulated. It also allows one to switch to different animations, allowing easy editing of more than one animation.
Animation Controls
By default, the animation plays at 30 frames per second, meaning that if a second keyframe was at frame 30, the animation will take exactly one second to complete.
The animation control panel allows one to play, play in reverse, step frames and move to the beginning or end of an animation, providing different methods to preview and fine tune the value changes over time.

At the bottom of the animation controls the animation preview playmode may be set:
Play Onceplays the animation and stops when the animation is overLoopplays the animation again after it's over and repeats it indefinitelyPingpongplays the animation forward and then backward after it's over and repeats it indefinitely
Take note that these changes do not take effect in-game. The in-game playmode may be changed through the object's SimpleAnimation component.

Preview Time Scaledetermines how fast the animation is played when previewed. This does not affect the in-game speed. The in-game timescale can be adjusted through the object's AnimationGraph Component.

Animator Settings
Here is a list of the other settings and functionalities of the Animator:

From left to right:
- X A field that displays the position of a key with respect to time (Horizontal Axis)
- Y A field that displays the position of a key with respect to its value (Vertical Axis)
- AutoKey button Allows for dynamically creating keys whenever the property of the object is altered.
- AutoFocus button Frames the selected curve or collection of keys on the animator screen when the curve changes (also accessible by pressing F)
Snapping XWhen toggled, the playhead will snap to the nearest X value.Onion SkinningWhen toggled displays ghost versions of the object with property values equivalent to frames close to the Play Head- {nav icon=square-o, name=Frames/Timecodes} Swaps between frames and timecode display at the bottom of the Playhead
Linear TangentsToggles whether to use linear tangents to edit the curveSplit TangentsToggle between splitting and joining the tangent between the left and right side of the pointWeighted TangentsToggle between weighted and non-weighted tangents
Examples
Moving Platform
It is very easy to create a moving platform by using the Animator.
First, add an AnimationGraph and SimpleAnimation component to the platform. Next create a new animation to edit.
Keyframe the initial position of the platform. Next move the playhead to sometime in the future (this will determine how fast the platform will move ) and have a keyframe of the platform at the end location.
Finally, the platform will move back and forth by selecting the Pingpong playmode on the platform's SimpleAnimation component.
Day-night Cycle
It is also very easy to create a day-night cycle by using the animator.
Here, a Sun object is centered at the center of the level. Parented to the Sun object, there is a directional light object that lights the level from a distance away. The goal is to simulate a day-night cycle by rotating the light around the level with the light always facing the center of the level.
This can be done by adding the AnimationGraph and SimpleAnimation component to the Sun object. Then a new animation must be created.
Next, keyframe the starting position of the Sun object rotation property. Move the playhead forward and create another keyframe. Click on the appropriate rotation property in the Animator and change the Y value of the Animator settings to the value 360.
Finally, set the playmode to loop.