(NOTE)Recommended Reading This page includes topics one might not have addressed yet. To learn about or review these topics, the following list provides the links to their respective Manual or Tutorial pages: Sprite Source Editor
Using the Sprite Importer
By taking a SpriteSource that has multiple frames and opening it in the Sprite Source Editor, it is possible to turn it into a moving animation. The first step is to open a SpriteSource in the Sprite Source Editor, then click on Convert To Animation.
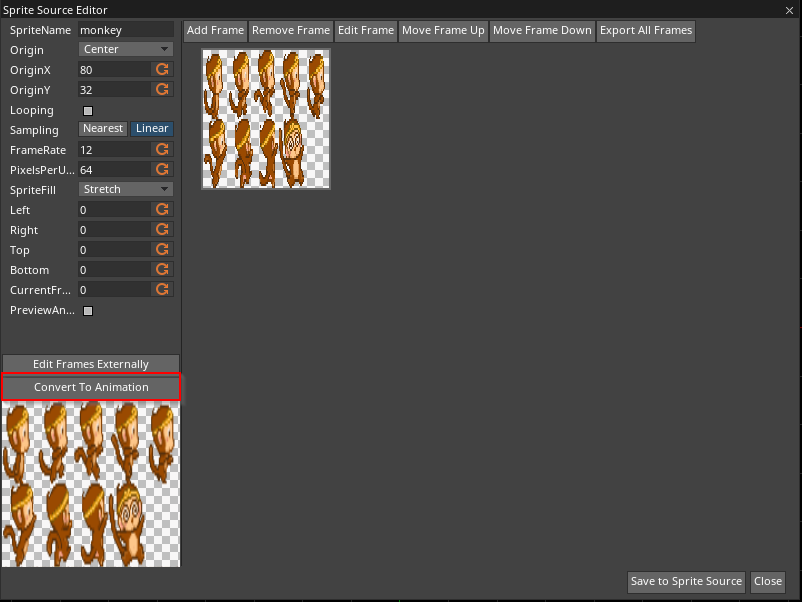 Sprite sheet in Sprite Source Editor
While a majority of the information is the same as that found in the Sprite Source Editor, there are a few very important differences highlighted here:
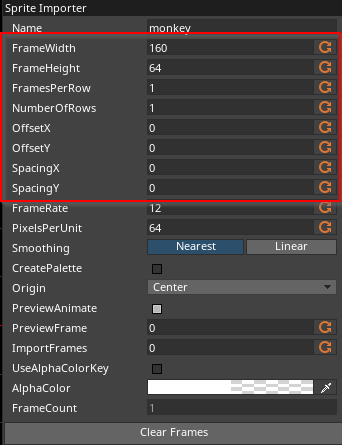 Sprite Source Editor Properties
Sprite Importer UI Overview
Name : The name of the output animation/sprites. FrameWidth : Uniform width of each sprite frame. FrameHeight : Uniform height of each sprite frame. FramesPerRow : Total image width divided by FrameWidth (not accounting for offset and spacing) NumberOfRows : Total image height divided by FrameHeight (not accounting for offset and spacing) OffsetX : Horizontal frame grid offset. OffsetY : Vertical frame grid offset. SpacingX : Horizontal space between frames. SpacingY : Vertical space between frames. FrameRate : Number of frames to display in one second. PixelsPerUnit : Number of pixels in the texture that will fit in one unit length in the GameSession's world space. Smoothing: The method of sampling used.
- Nearest: looks more discrete, or 'pixelated'
- Linear: pixels are blurred together
CreatePalette checkBox: Creates a TilePalette with the {Add Frames as Sprites
action. [Origin](../../../../code_reference/enum_reference.md#spriteorigin): The point of the given frame that is(0,0,0)` in object space. - Custom: choose your own origin
- Center: the middle of the frame
- UpperLeft: the top left of the image
- BottomLeft: the bottom left of the frame
- BottomCenter: the bottom center of the frame
PreviewAnimate checkBox: Toggle viewing the animation.
PreviewFrame : Set the previewed animation frame.
UserAlphaColorKey checkBox: Toggle whether or not to convert the alpha of AlphaColor to
0. AlphaColor : The color to be transparent if UserAlphaColorKey checkBox istrue. FrameCount : The number of frames that will be output.Clear Frames: Unselect all frames.Add Frames as Sprites: Add each frame as a new sprite, where the name is appended with the frame index for each new sprite.Add and Close: PerformAdd and Continue, then Close button.Add and Continue: Create a new animatedSpriteSourcefrom the selected frames. Close button: Close the Sprite Source Editor.
Frame Cell Sizes
When parsing images in a spritesheet, it's standard to have every frame of a set of animations alligned to a 2D grid. The red grid in the Sprite Source Editor shows how the sprite sheet is subdivided into frames. The size of each frame is controlled by one of two pairs of options: FrameWidth and FrameHeight , or FramesPerRow and NumberOfRows . If the width and the height of each frame are known, then by putting that into FrameWidth and FrameHeight it will calculate how many Rows to break the original image into as well as how many Frames are in each Row. Likewise by setting the NumberOfRows and FramesPerRow it will calculate what the width and height of each frame should be.
Frame Cell Offsetting
OffsetX , OffsetY , SpacingX and SpacingY are used to control the offset of the frame cells into the spritesheet. OffsetX and OffsetY will move the starting point of the first frame forward, which will also push every other frame forward by the same amount. SpacingX and SpacingY do not effect the first Frame or Row, but rather adds a space in between each instead. When changing the frame cell offsets, NumberOfRows and FramesPerRow will be modified such that the number of frames cells is maximized, and so that no frame cell reaches outside the bounds of the sprite sheet.
Choosing Frames for Animations
At this point, if the animation is playing properly, it's simply a matter of clicking either Add and Close or Add and Continue to add the animations as SpriteSources. Add Frames as Sprites will add each individual frame as its own SpriteSource, and Close button will close the window and discard all work done to the SpriteSource. This assumes, however, that all cells within the grid are apart of the animation. Here's an example where this isn't the case:
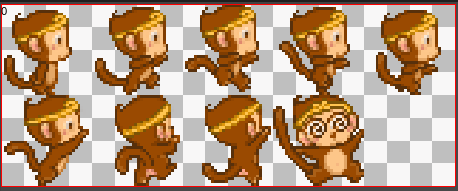 Sprite sheet with all frames selected by default
The SpriteSource uses the top row for one animation while the bottom row contains separate sprite frames.
 Animation with all frames
The second row contains frames that are not part of the animation contained in the first row; therefore, they should be ommited from the animation. To do this, every frame in the animation needs to explicitly be selected with the mouse.
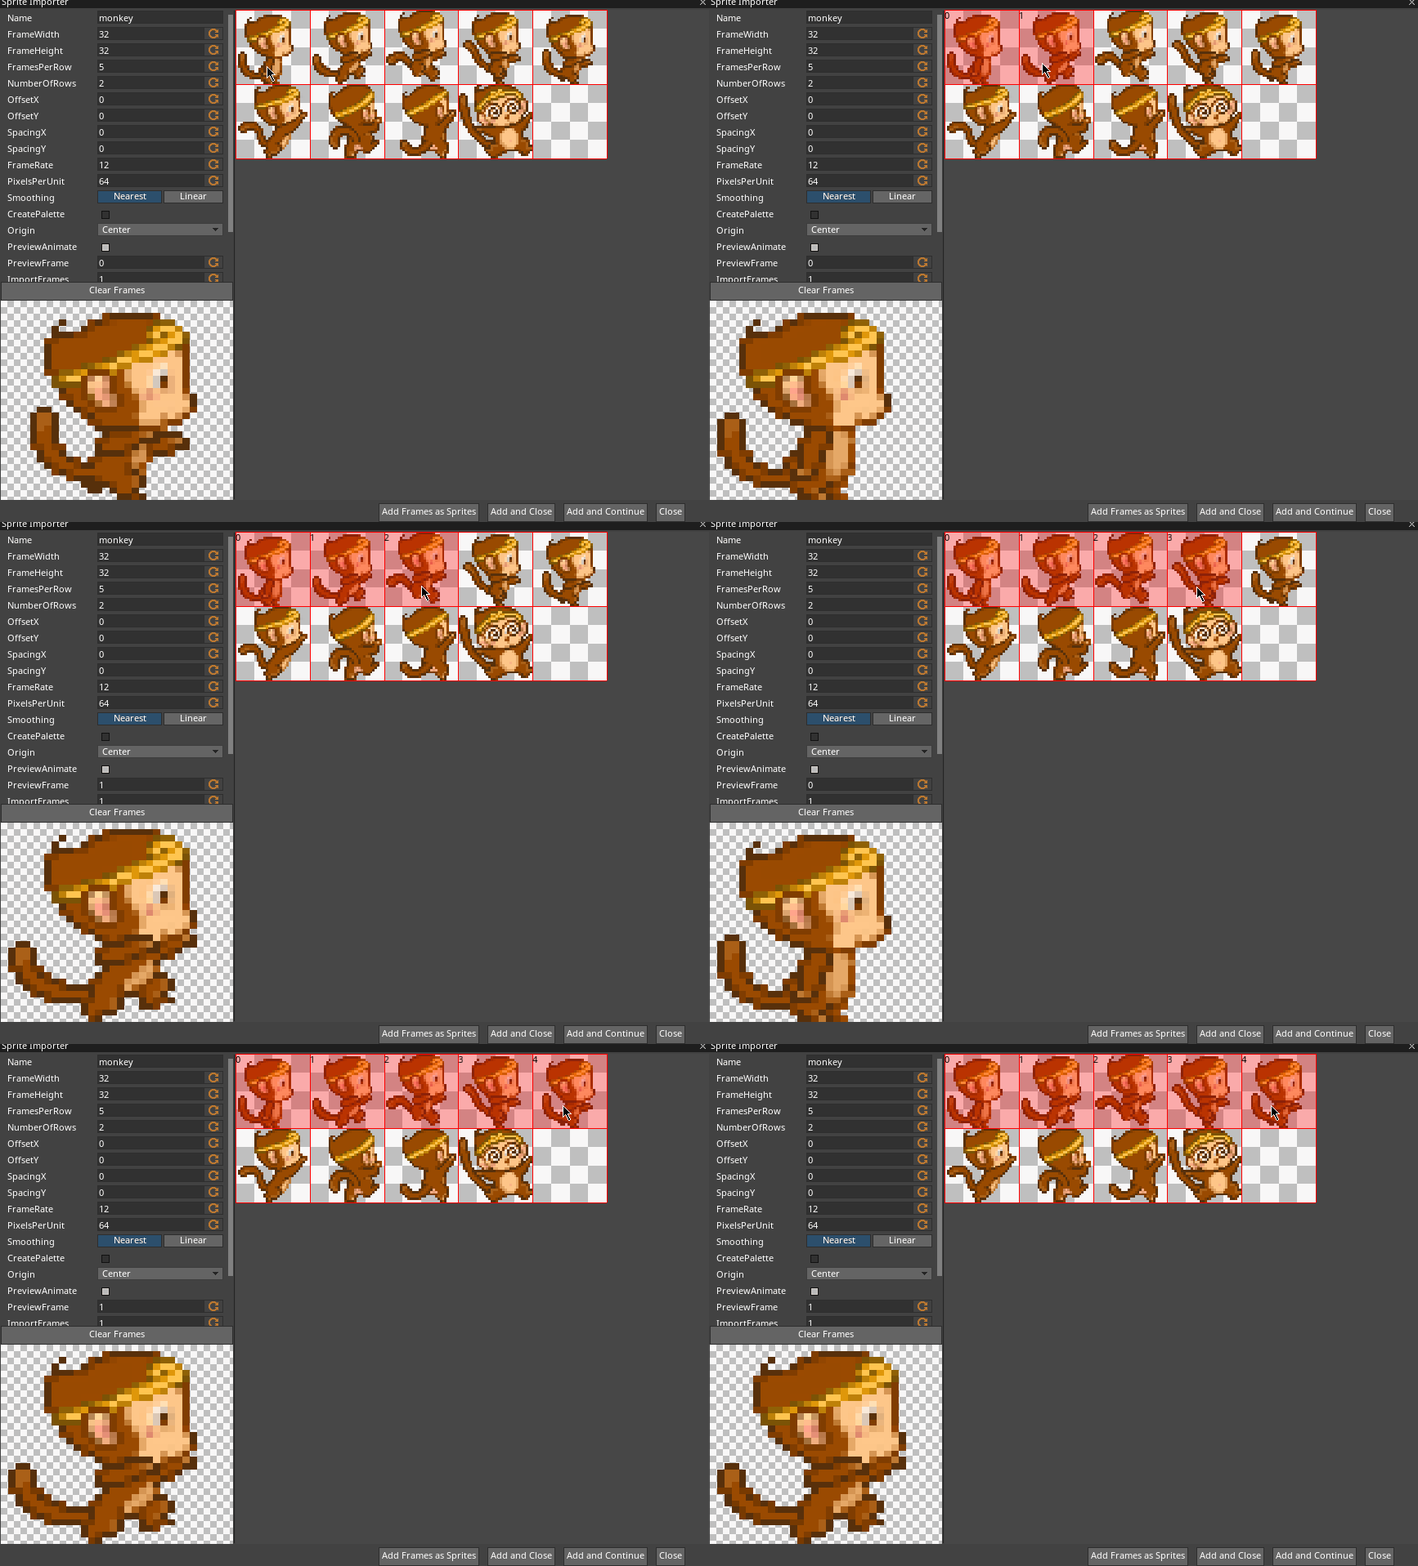 Sprite sheet selecting all relevant frames
(WARNING)Mouse Selected Frame Order: The default frames are indexed from left to right, and top to bottom. When selecting frames explicitly with the mouse, the order of frames in the animation is the order that the frames are clicked. The index of each frame is also denoted by an integer in the top left of each cell in the sprite sheet.
 Animation without blank frame
If your SpriteSource doesn't have a blank background, it's possible to use the Sprite Importer to erase the background color. Simply set AlphaColor to the color that needs to be erased (this is the perfect application for the EyeDropper tool), and set UseAlphaColorKey checkBox to true. On importing the Sprite, the color chosen will be erased.