This lesson introduces the Zilch Launcher and explains how to use it.
Download the Engine
(IMPORTANT)Restricted Launcher Download: Currently only registered DigiPen students with a valid DigiPen login can download the Zilch Launcher.
Learning Objectives
- Understand the various tabs and sections of the launcher.
- Be able to create new projects.
- Installing new builds of the Zilch Engine.
The Discover Tab
The Discover tab is the Launcher's information hub. It features a number of useful links to informative websites:
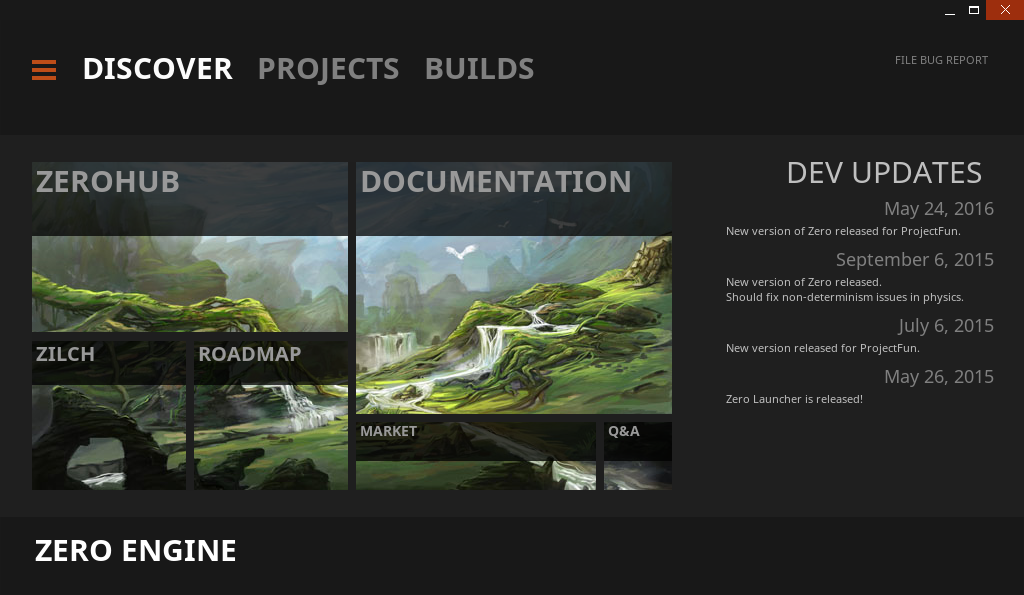
The ZilchHub link opens the Zilch Engine open source development site.
The Documentation link opens the Zilch Engine documentation website
The Nada link takes you to the manual on Nada, the programming language used by the Zilch Engine
The Roadmap link shows you the Zilch Engine's long term roadmap workboard
The Market opens the Zilch Market where you can find free and commercial assets for you projects.
The Q&A link connects you to the Zilch Engine's Q&A page, where you can ask questions about the engine, the editor, Nada, etc.
The Projects Tab
The New Project Sub-Tab
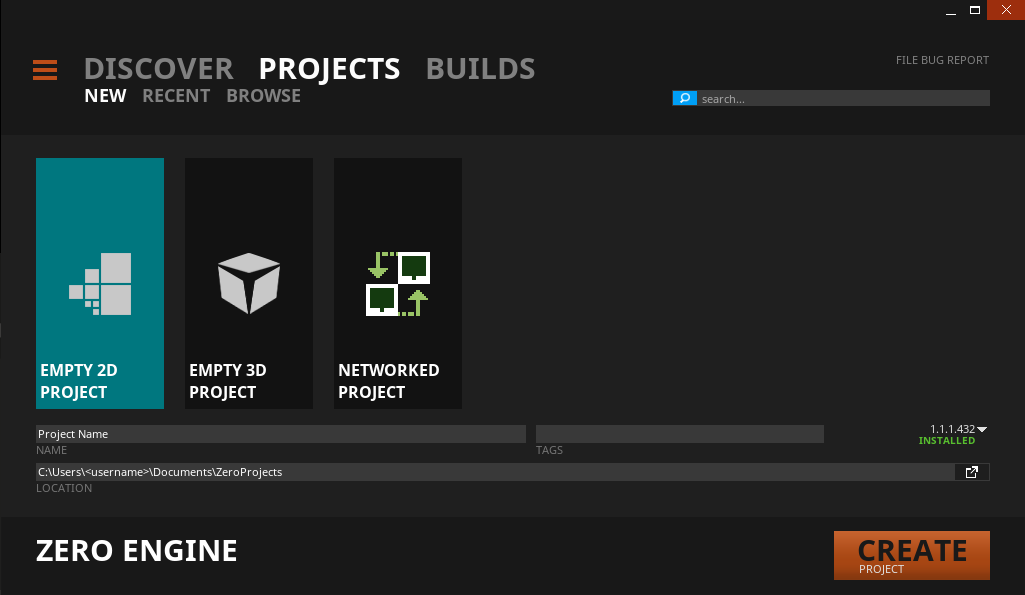
- Choose a template to start with:
- Empty 2D Project and Empty 3D Project will both result in an empty Zilch project, but with a few differences in in editor settings and initial project configuration.
- Networked Project is an empty 3D project with some pre-configured elements to facilitate proper architecture for a networked project.
| New Project Default Settings by Template | |||
|---|---|---|---|
| Setting | Description | EMPTY 2D PROJECT | EMPTY 3D PROJECT |
| PhysicsSpace | Default behavior for collision resolution | true |
true |
| EditorCamera | Settings of editor camera | 2D (orthographic, etc..) | 3D (perspective, etc.. |
| Default Camera | Settings of the camera that is placed by default in each new level | 2D (ortographic, etc...) | 3D (perspective, etc...) |
| GridDraw Axis | Perpendicular axis to the grid plane | ZAxis |
YAxis |
(NOTE) Remember, even if you start with the 2D template, you can still use 3D elements and concepts in your game, and vice versa. The template you choose simply specifies the default settings for certain properties. Keep in mind that you will only be asked to create 2D projects in this book.
Type a name for the project in the Name field. (You will be notified if a project by the same name already exists in the folder specified in the Location field.)
Specify where the project should be created in the Location field. The default path for new projects can be changed in The Settings Tab.
- You can use the Open Path button next to the field to browse to a desired folder in your operating system's Folder Selection dialog.
Optionally, you may give the project tags by typing them, separated by commas, in the Tags field. Tags are just bits of text that can be used as keywords when searching for projects in the Recent Projects subtab.
Specify which Zilch Engine build version that you want to use to create the project in the Build popup menu (build 13480).
When you are ready, click the Create Project button. This will create a folder with the project name in the specified location containing the project file and Content folder. Clicking the Recent button will bring up the Recent Projects subtab.
Recent Projects
Here, you will see a list of the latest Zilch projects that you have worked on.
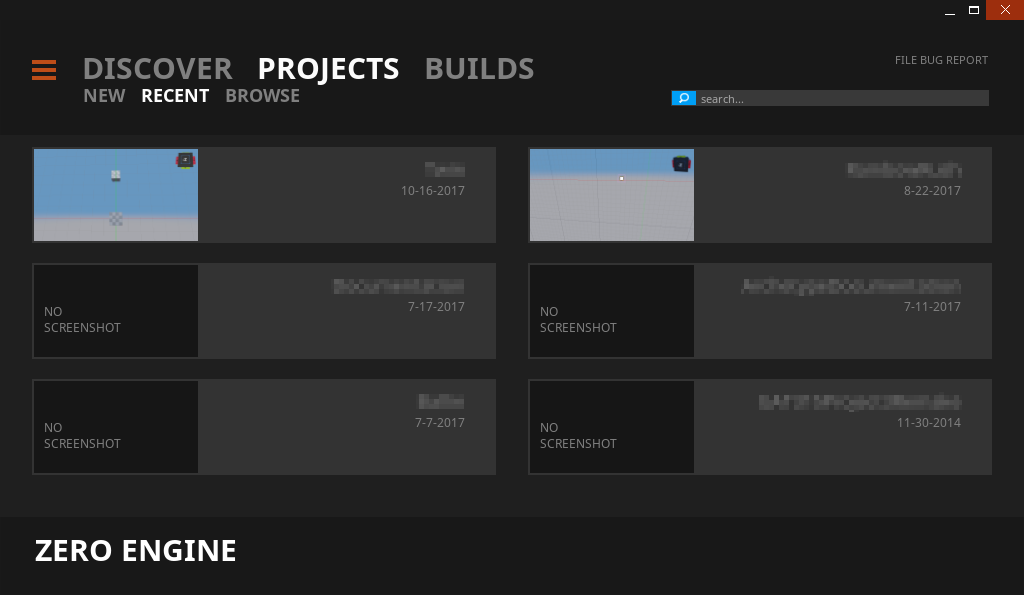
- Each recently-used project appears here, with its name and modified date shown next to a thumbnail screenshot.
- You may use the Search field to search through your recent projects, either by name or by tags.
- When you mouse over a recent project, its Remove button will appear, which you may use to remove the project from the Recent Projects subtab.
- Removing a project in this way does not delete it from your computer it is only removed from this list.
When you click on a recent project, you will see this:
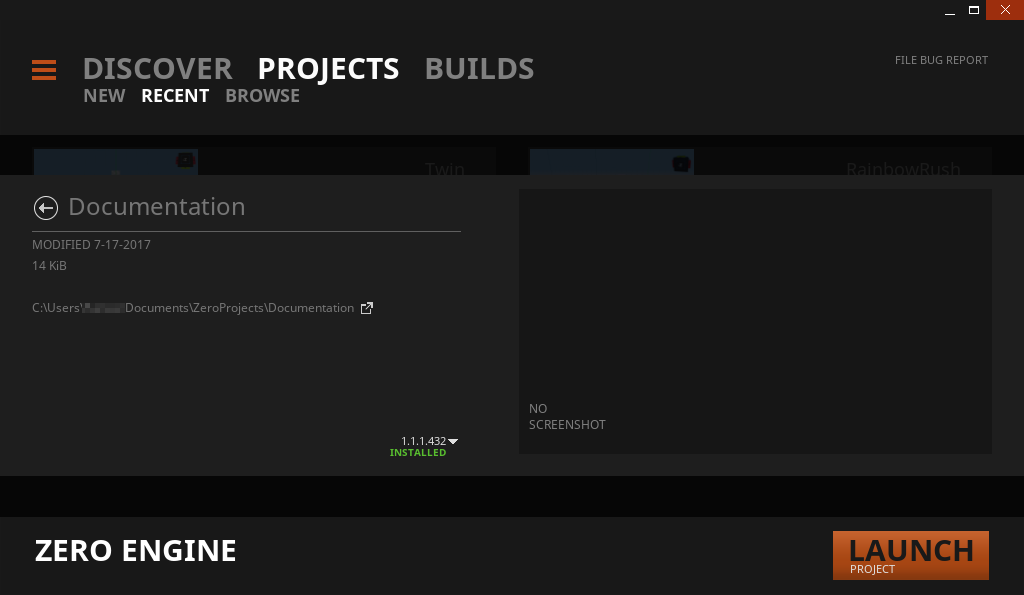
- To open the project, click the Launch Project button.
- You may choose which installed Zilch Engine build version you wish to open the project in by selecting the desired build from the Build popup menu.
- Clicking the Open Path button will open the project folder in your operating system.
- To return to the list of recent projects, click the Back button.
Finally, in the Projects tab, there's the Browse button.
Browse Projects
Click Browse to find a Zilch project through your operating system's Open dialog.
The Builds Tab
The Builds tab features a list of Zilch Engine build versions that are installed n your computer or available for download.
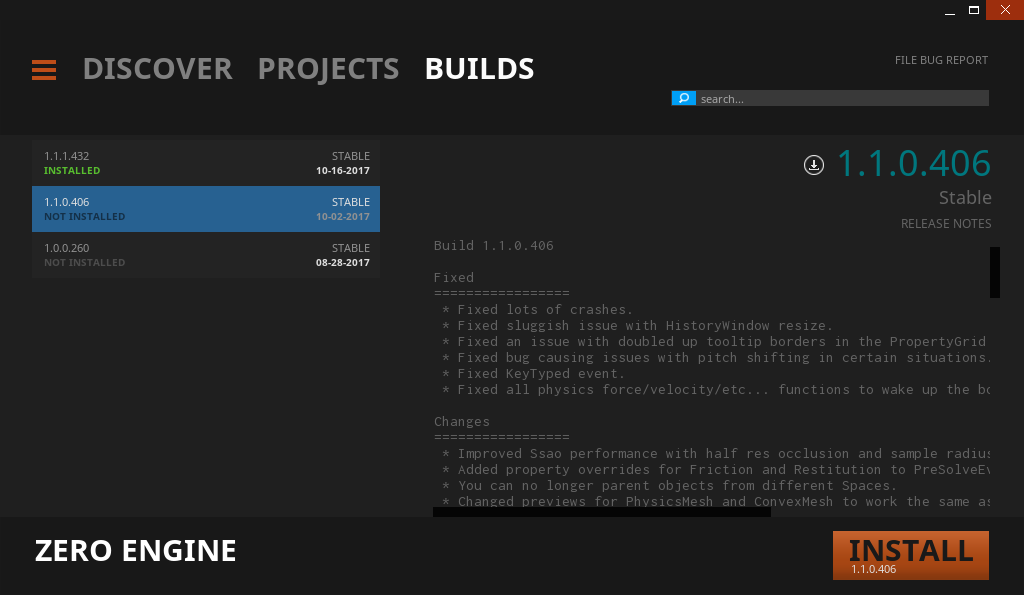
Each build is listed in the Build List section of the builds tab, with its build number, release date, and tags.
Further information on the selected build can be found in the Details pane.
You may use the Search field to search through the Build List, either by build number or by tags.
Click the Install Build button to download and install the selected build.
Click the Uninstall button to remove the selected build from your computer.
NOTE: You may have any number of different builds installed simultaneously.
The Settings Tab
Finally, there's the Settings tab, found by clicking the little orange horizontal lines. Here, you can configure a number of different properties about how the Launcher itself behaves.
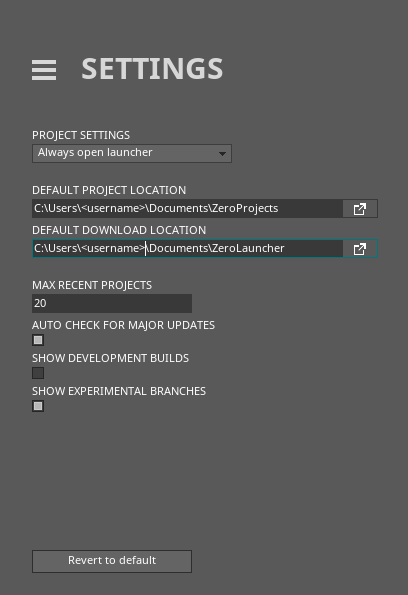
- The
Project Settingsdrop down menu controls what happens when you open a project from your operating system (i.e., by double-clicking on its icon):
- Always open launcher: Opening a project will open the Launcher and bring you directly to it in the Recent Projects subtab
- Auto run project if build installed: If the Zilch Engine build version that was used to save the project is installed on your computer, then the project will directly open in that version, bypassing the Launcher.
- The
Default Project Locationfield defines the default path where new projects will be created.
- You can use the Open Path button next to the field to browse to a desired folder in your operating system's Folder Selection dialog.
- New projects can still be created elsewhere, by specifying a different path in the New Project subtab.
- The
Default Download Locationfield defines the path to which new build versions are downloaded and installed.
- You can use the Open Path button next to the field to browse to a desired folder in your operating system's Folder Selection dialog.
The
Max Recent Projectsfield sets how many recent projects will appear in the Recent Projects subtab.The
Auto Check for Major Updatesfield allows the launcher to periodically check the ZilchHub server to see if a new major version of the Zilch Engine has been released.The
Show Development Buildscauses all public builds built off the develop branch in rZCORE to be seen in the Builds Tab. Many of these builds will be simple bug fixes and minor functionality changes. HOwever, these builds are usually not guarenteed to be stabled and as such most users should stick to builds tagged stable.The
Show Experimental Buildscauses all public builds built off an experimental branch in rZCORE to be seen in the Builds Tab. These builds are often unstable and may contain large refactors or experimental functionality.The
Revert to defaultbutton restores the Launcher to its default settings.