Developers often find themselves needing to make lists of data within their application. The most common way to keep a list of elements is via an Array.
Learning Objectives
- Arrays
- Array methods
- Element iteration
Level Setup
- Command : New Project
- Create a new project using the {nav icon=clone, name=Empty 2D Project} template
- Command : Add Resource
- Create a NadaScript resource using the Component template template and name it
ArrayExample
Declaration
Array is a Nada Base Type that acts a container for other variables.
- Update the
ArrayExampleclass to the following:
class ArrayExample : NadaComponent
{
  var DefaultConstructorExample : Array[Integer] = Array[Integer]();

  function Initialize(init : CogInitializer)
  {
    Console.WriteLine(this.DefaultConstructorExample);
  }
}
Notice how we pass the type Integer to both the array type declaration and the array constructor. When declaring or constructing an array, you put the type that the array will hold in square brackets ([]).
- Select : LevelSettings object
- In the
Properties Window - Add Component :
ArrayExample - Command : Console
- Command : PlayGame
---------------- Begin Game ----------------
{}
Level 'Level' was loaded.
Loaded level 0.00s
Here we can see the empty array print out as {}.
Let's look at how to initialize an array on construction so it is not immediately empty.
Initialization
Array initialization is most often done using constructors.
Constructors
We have already used the default constructor in the example above. It creates an empty array that can be filled with instances of the defined type. It is important to remember that an array variable must be declared and initialized before it can be used. Unlike a Real or Integer, arrays will not be implicitly initialized by their default constructor.
Initializer List
Another way to initialize an array is to use an initializer list that allows the user to manually determine the value of each element in the array individually.
- Add the following to the
ArrayExampleclass:
var InitializarListExample : Array[Integer] = Array[Integer]() {6, 7, 8, 9};
- Add the following to the
Initializefunction in theArrayExampleclass:
Console.WriteLine(this.InitializarListExample);
---------------- Begin Game ----------------
{}
{6, 7, 8, 9}
Level 'Level' was loaded.
Loaded level 0.00s
We can see the array we constructed using an initializer list printed out with the exact values we passed to the initializer list.
[] (Subscript) Operator
Reading
The [] (subscript) operator can be used as a method of accessing individual elements in an array.
- Add the following to the
Initializefunction in theArrayExampleclass:
Console.WriteLine(this.InitializarListExample[2]);
---------------- Begin Game ----------------
{}
{6, 7, 8, 9}
8
Level 'Level' was loaded.
Loaded level 0.00s
We can see that 8 is printed out to the Console Window which is the value of indexed by 2 in our example usage of the [] operator. We will see more usage of the [] operator further on.
(NOTE)Counting from 0: You may have figured this out already but in most programming languagwe always start counting at 0. This means that the first index in any array is 0. So by using the index 2 above we are accessing the third element in the array.
Writing
The [] operator can also be used to overwrite the value of an element which already exists in the Array.
- Add the following to the
Initializefunction in theArrayExampleclass:
this.InitializarListExample[2] = 0;
Console.WriteLine(this.InitializarListExample);
---------------- Begin Game ----------------
{}
{6, 7, 8, 9}
8
{6, 7, 0, 9}
Level 'Level' was loaded.
Loaded level 0.00s
We can see the element with an index of 2 is set to a value of 0.
Adding Elements
We have looked at how to declare and initialize arrays using a rather basic example so far. Let's learn about adding to arrays using an example that is more applicable.
- Command : Add Resource
- Create a NadaScript resource using the Component template template and name it
SpawnOnInput - In the
SpawnOnInputscript - Update the
SpawnOnInputscript to the following:
class SpawnOnInput : NadaComponent
{
  [Property]
  var SpawnLocation : Real3;

  [Property]
  var ObjectToSpawn : Archetype = Archetype.Sphere;

  [Property]
  var SpawnInput : Keys = Keys.Space;

  function Initialize(init : CogInitializer)
  {
    Zilch.Connect(Zilch.Keyboard, Events.KeyDown, this.OnKeyDown);
  }

  function OnKeyDown(event : KeyboardEvent)
  {
    if(event.Key == this.SpawnInput)
      this.Spawn();
  }

  function Spawn()
  {
    //Spawn the object
    var obj = this.Space.CreateAtPosition(this.ObjectToSpawn, this.SpawnLocation);

    //Tell the owner that an object has been spawned
    var objEvent = ObjectSpawnedEvent();
    objEvent.Obj = obj;
    this.Owner.DispatchEvent(Events.ObjectSpawnedEvent, objEvent);

  }
}

class ObjectSpawnedEvent : NadaEvent
{
  sends ObjectSpawnedEvent : ObjectSpawnedEvent;
  var Obj : Cog;
}
This is just a utility component similar to some we have seen in previous tutorials. We will be using this component to spawn object that we will track using an array in another component.
- Command : CreateCube
- Remove Component : RigidBody
- In the
Properties Window - Under Transform
- Set Translation to
[0, -5, 0] - Set Scale to
[15, 1, 1]
Add
Array.Add is a function that lets the user add elements to the end of the array. Let's look at how we can use this to add the enemy spheres we are going to spawn.
- Command : Add Resource
- Create a NadaScript resource using the Component template template and name it
EnemyManager - In the
EnemyManagerscript - Update the
EnemyManagerclass to the following:
class EnemyManager : NadaComponent
{
  var Enemies : Array[Cog] = Array[Cog]();

  function Initialize(init : CogInitializer)
  {
    Zilch.Connect(this.Owner, Events.ObjectSpawnedEvent, this.OnObjectSpawnedEvent);
  }

  function OnObjectSpawnedEvent(event : ObjectSpawnedEvent)
  {
    this.Enemies.Add(event.Obj);
    this.PrintEnemies();
  }

  function PrintEnemies()
  {
    Console.WriteLine("Current Enemy Objects:");
    Console.WriteLine(this.Enemies);
  }
}
Select : LevelSettings object
In the
Properties WindowRemove Component :
ArrayExampleAdd Component :
SpawnOnInputAdd Component :
EnemyManagerPress
Spacea few times

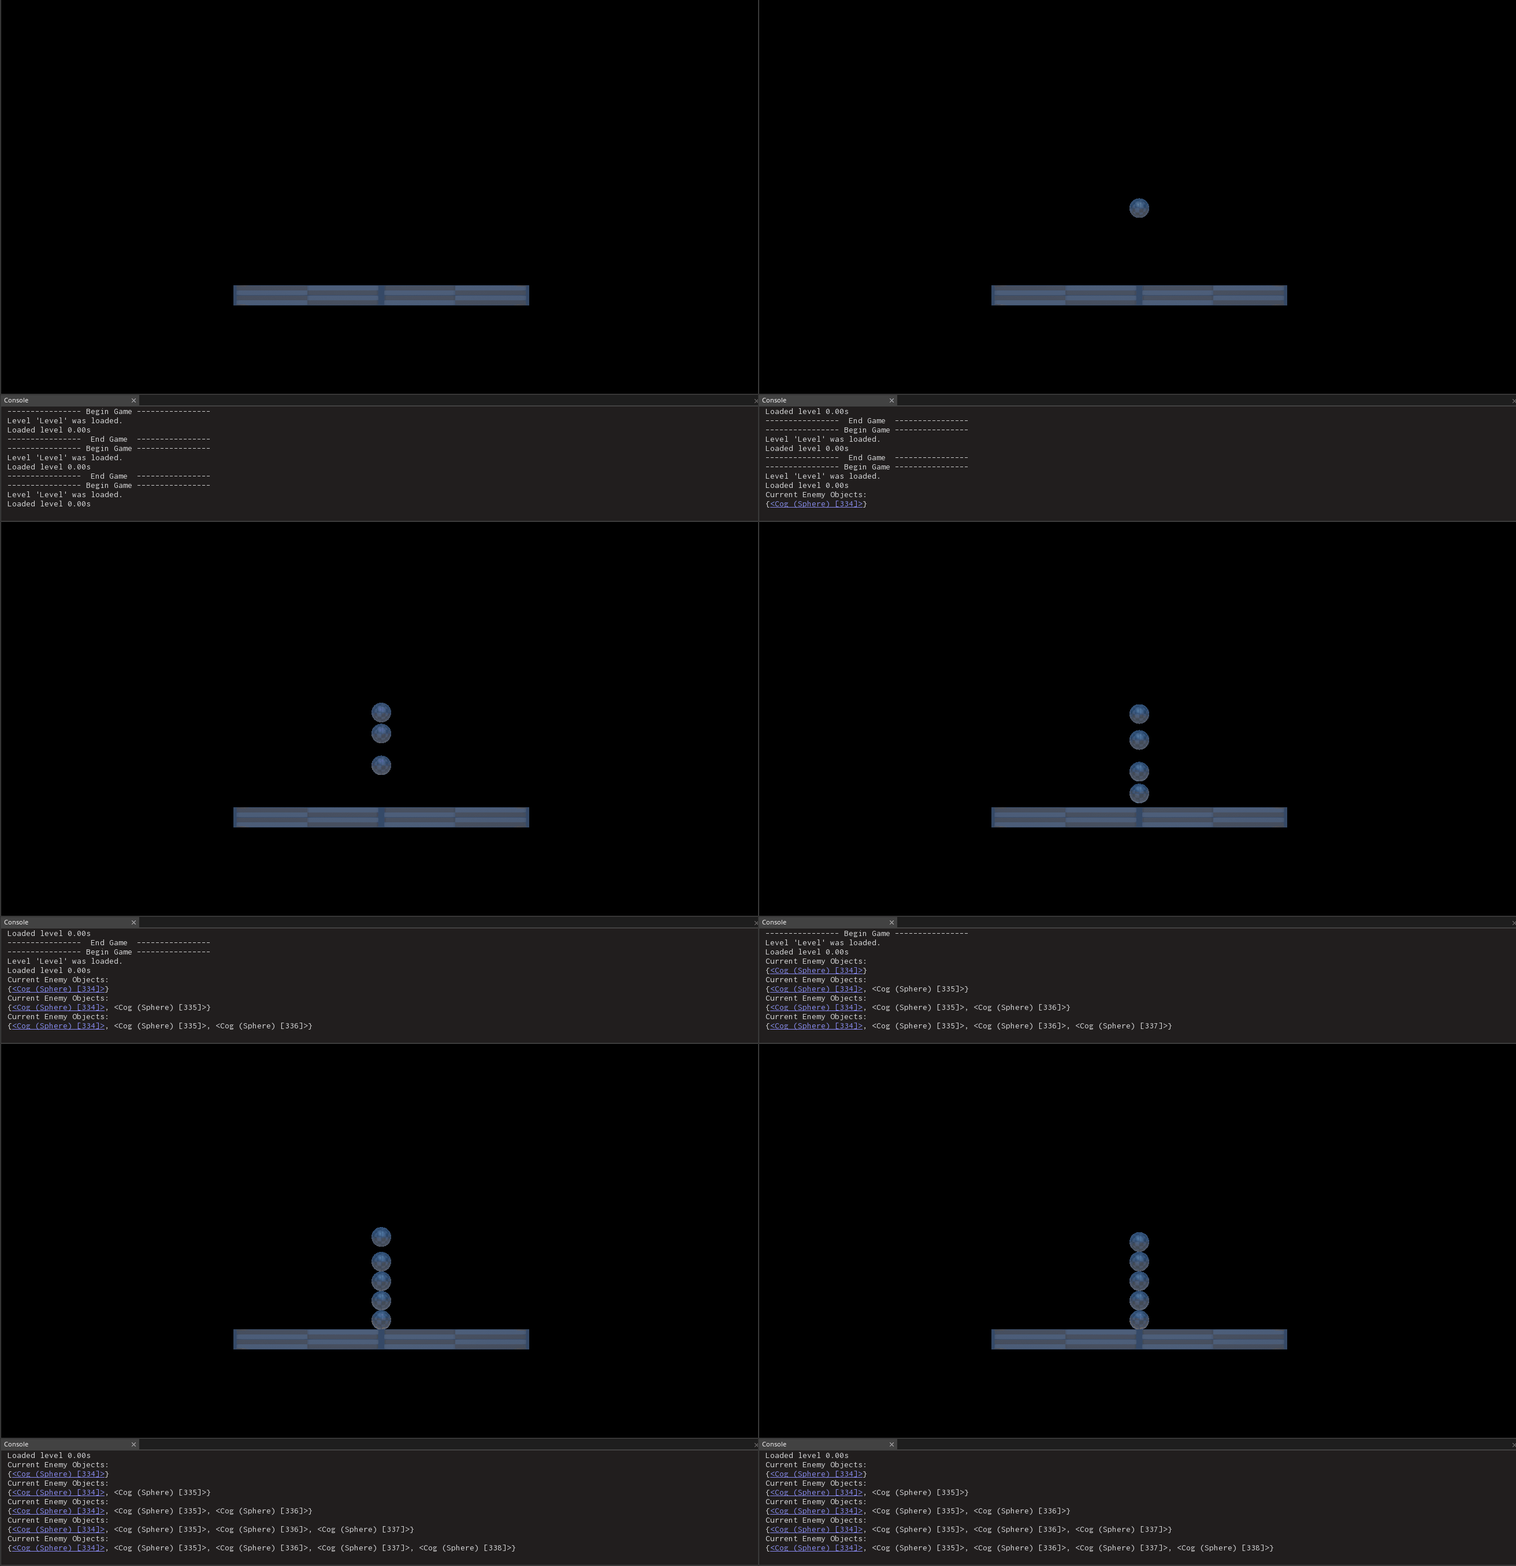
We can see a new enemy spawned each time we pressed space. We can also see that each spawned object was added to the Enemies array in EnemyManager as we print it to the console following spawning the object.
Accessing Elements
So far we have looked at how to create and add to arrays. What use is building a list of items if we can't use it to access those items though?
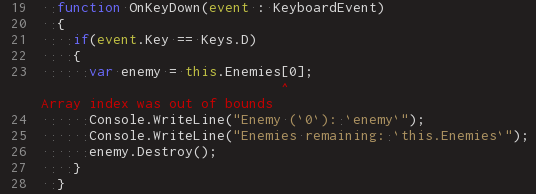
The Out of Bounds Exception
The [] (subscript) operator can be used as a method of accessing individual elements in an array, but often developers make a mistake and pass the [] operator an index that does not exist in the array.
- In the
EnemyManagerscript - Add the following to the
Initializefunction in theEnemyManagerclass:
Zilch.Connect(Zilch.Keyboard, Events.KeyDown, this.OnKeyDown);
- Add the following to the
EnemyManagerclass:
function OnKeyDown(event : KeyboardEvent)
{
  if(event.Key == Keys.D)
  {
    var enemy = this.Enemies[0];
    Console.WriteLine("Enemy (`0`): `enemy`");
    Console.WriteLine("Enemies remaining: `this.Enemies`");
    enemy.Destroy();
  }
}

In this case, we had not created an enemy so there was nothing in the array to access and the index was "out of bounds". We need to always ensure that whatever index we use to access an array element is always less than the number of elements and greater than or equal 0. We should also make sure the array is not empty before trying to access its elements.
Removing Elements
- Select : LevelSettings object
- In the
Properties Window - Add Component : RandomContext
- In the
EnemyManagerscript - Add the following to the
EnemyManagerclass:
[Dependency] var RandomContext : RandomContext;
- Replace the
OnKeyDownfunction in theEnemyManagerclass with the following:
function OnKeyDown(event : KeyboardEvent)
{
  //check the array is not empty before trying to access
  if(event.Key == Keys.D && this.Enemies.Count > 0)
  {
    //DieRoll returns a value in range [1,n], we subtract 1 to shift randIndex to the range [0,n-1]
    var randIndex = this.RandomContext.DieRoll(this.Enemies.Count) - 1;
    var enemy = this.Enemies[randIndex];
    Console.WriteLine("Enemy (`randIndex`): `enemy`");
    Console.WriteLine("Enemies remaining: `this.Enemies`");
    enemy.Destroy();
  }
}

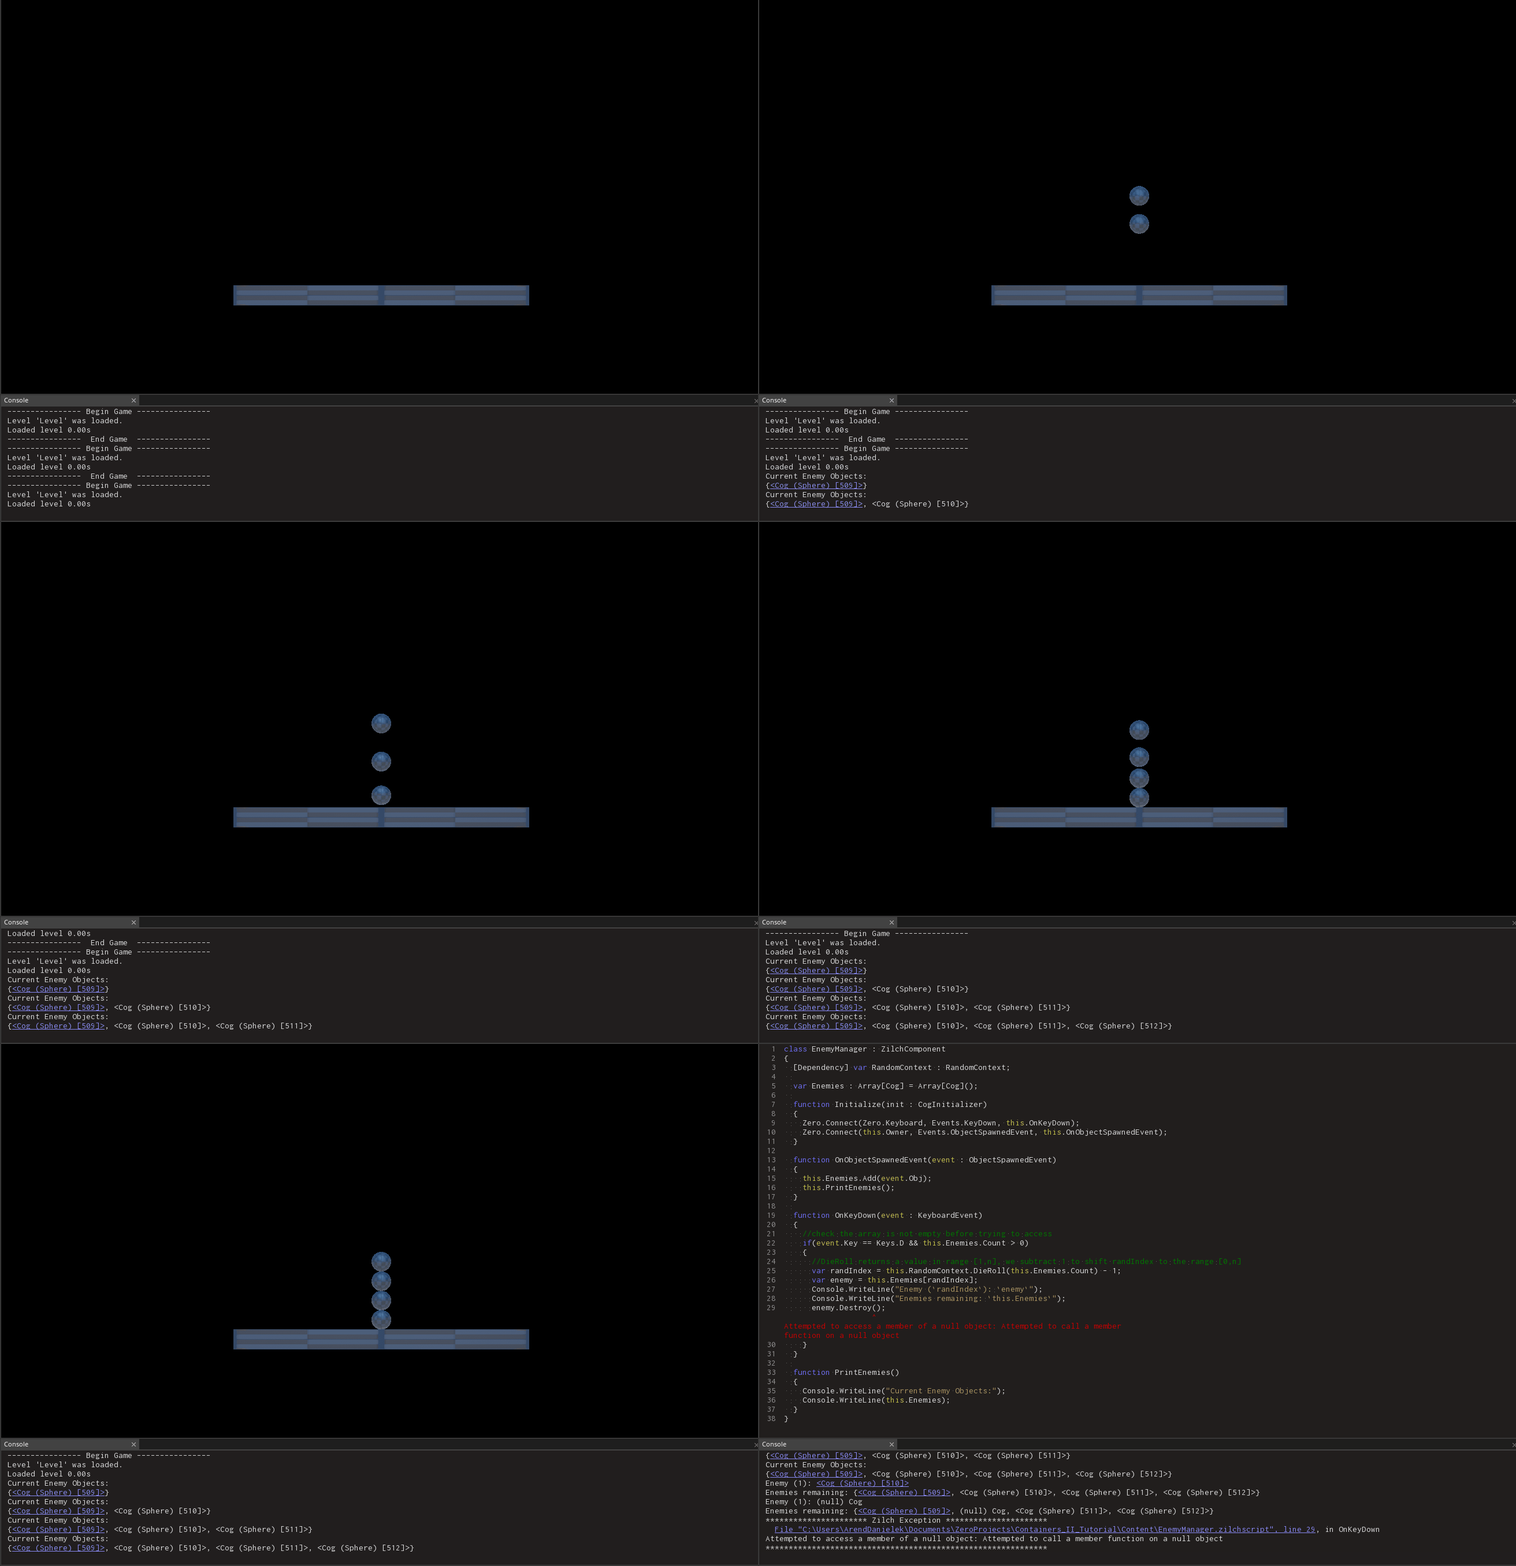
- Repeat the last two steps until you receive the following error

Notice how each time D is pressed and an enemy is destroyed, the length of EnemyManager.Enemies does not change. Just because we destroyed the enemy objects does not mean that the references to them we put in the array are removed. The exception is thrown when we attempt to access a member of one of the null references to one of the destroyed cogs. We need to remove these references when we destroy the cogs in order to prevent null references from existing in the array.
RemoveAt
- Replace the
OnKeyDownfunction in theEnemyManagerclass with the following:
function OnKeyDown(event : KeyboardEvent)
{
  if(event.Key == Keys.D && this.Enemies.Count > 0)
  {
    //DieRoll returns a value in range [1,n], we subtract 1 to shift randIndex to the range [0,n]
    var randIndex = this.RandomContext.DieRoll(this.Enemies.Count) - 1;
    var enemy = this.Enemies[randIndex];
    this.Enemies.RemoveAt(randIndex);
    Console.WriteLine("Enemy (`randIndex`): `enemy`");
    Console.WriteLine("Enemies remaining: `this.Enemies`");
    enemy.Destroy();
  }
}

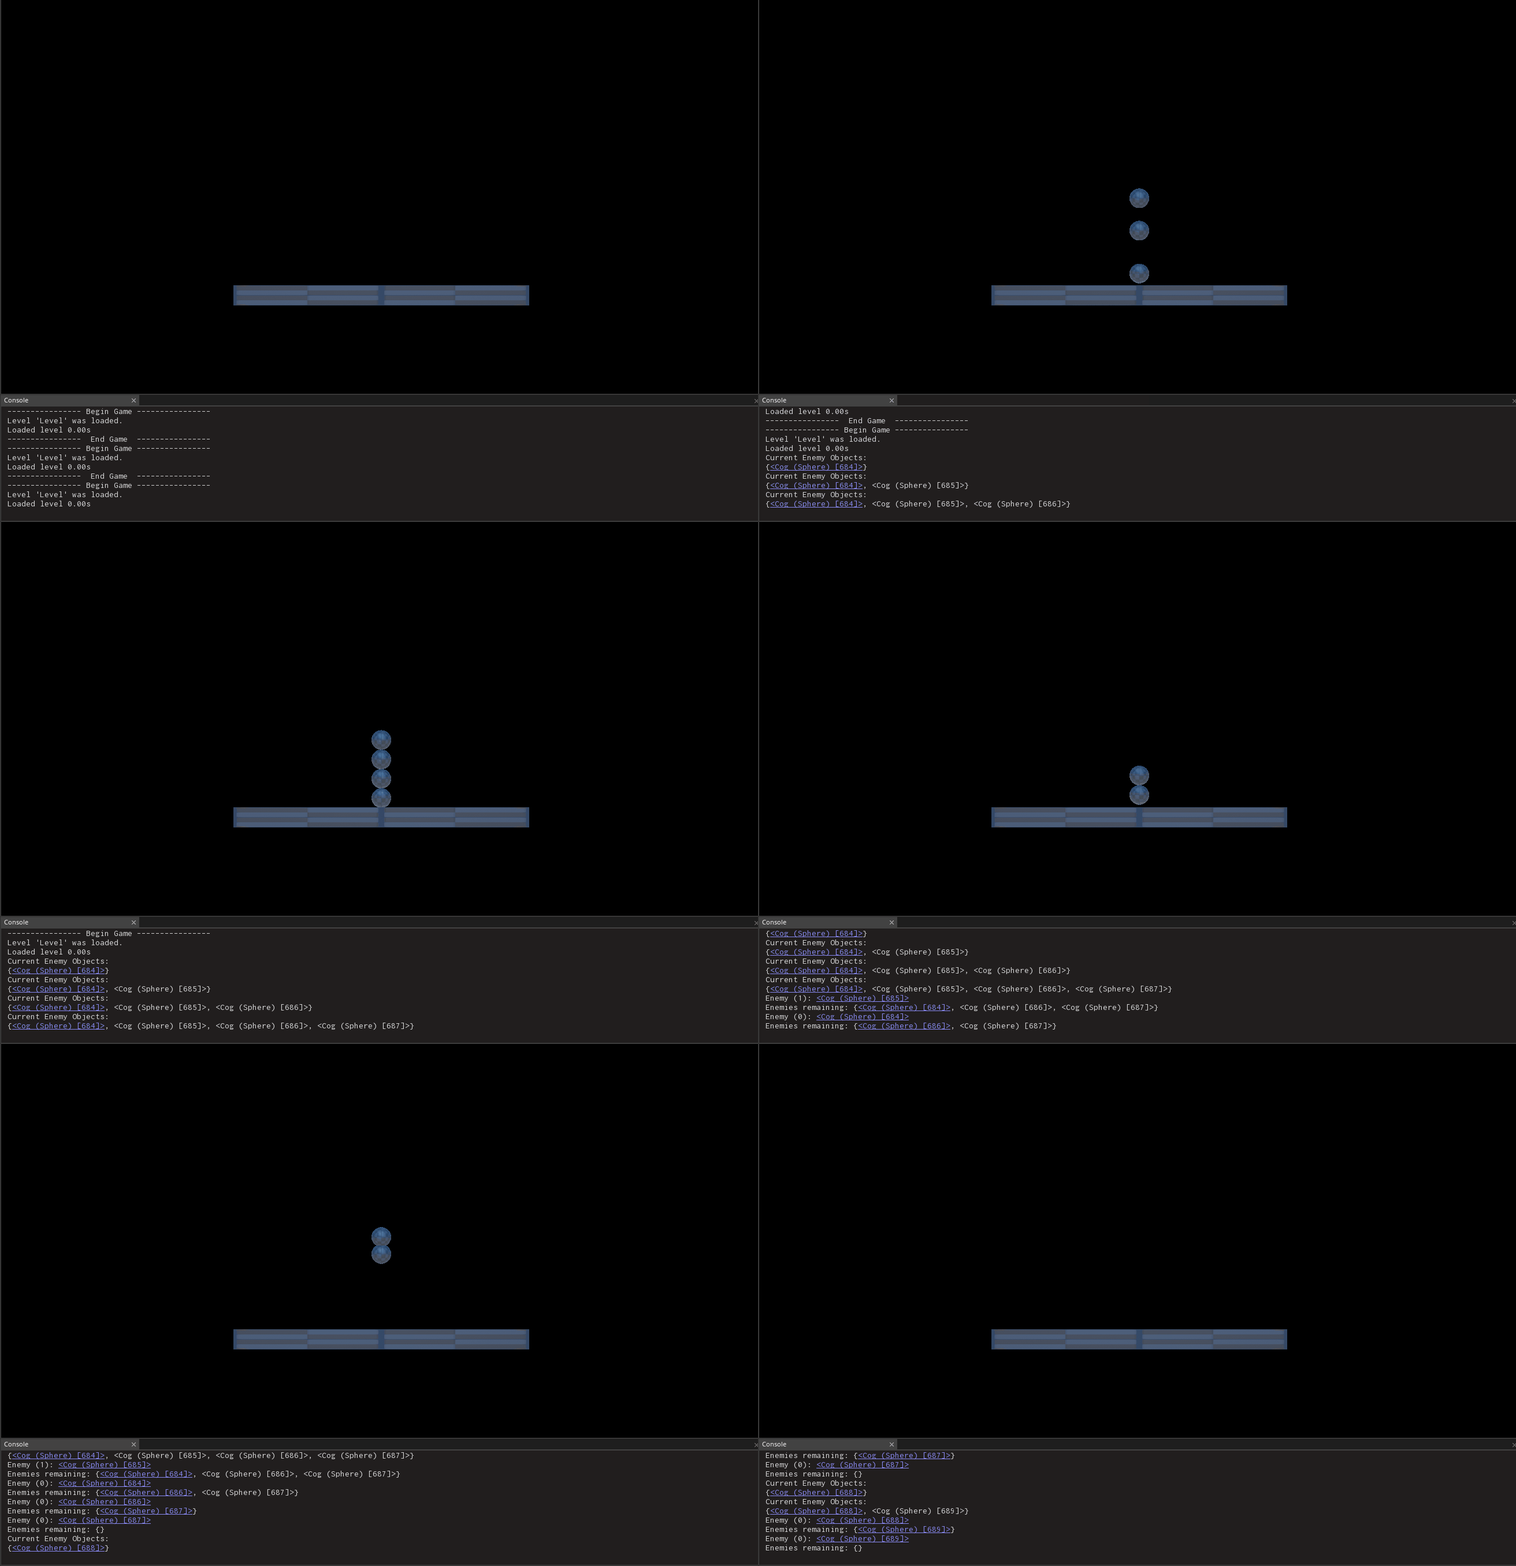
By calling RemoveAt we removing an element at a paticular index. By removing the element before deleting the object we prevent there from ever being a null reference in the array to mistakenly access later.
Iterating
Now, what if we wanted to perform a group operation on all the enemies in the array on the same frame. With our current implementation, we can only destroy one cog at a time. We need a way to walk the array and perform the same operation on each element.
Indexing
Performing the same operation multiple times should remind you of loops. As it turns out for loops are great for iterating over the elements of an array.
- Replace the
OnKeyDownfunction in theEnemyManagerclass with the following:
function OnKeyDown(event : KeyboardEvent)
{
  if(event.Key == Keys.D)
  {
    for(var i = 0; i < this.Enemies.Count; ++i)
    {
      var enemy = this.Enemies[i];
      enemy.Destroy();
    }
    this.Enemies.Clear();
    Console.WriteLine(this.Enemies);
  }
}
Here we are using the for loop to increment the index variable i each iteration of the loop. We are also using Array.Count to determine the number of iterations. An array has indexes corresponding to each of its element. The indexes range from 0 to Array.Count - 1. This means that by initializing i to 0 and stopping the loop when i is no longer less than this.Enemies.Count, the index i will iterate over the entire array.
---------------- Begin Game ----------------
Level 'Level' was loaded.
Loaded level 0.00s
Current Enemy Objects:
{<Cog (Sphere) [726]>}
Current Enemy Objects:
{<Cog (Sphere) [726]>, <Cog (Sphere) [727]>}
Current Enemy Objects:
{<Cog (Sphere) [726]>, <Cog (Sphere) [727]>, <Cog (Sphere) [728]>}
{}
Now that we are accessing and destroying each cog in the array all at once we needed a way to do the same for removing the references from the array. Array.Clear removes all elements from the array, which is perfect considering we just destroyed all the cogs referenced in the array elements.
Using foreach
There is a slightly simpler way of iterating over an array.
- Replace the
OnKeyDownfunction in theEnemyManagerclass with the following:
function OnKeyDown(event : KeyboardEvent)
{
  if(event.Key == Keys.D)
  {
    foreach(var enemy in this.Enemies)
      enemy.Destroy();

    this.Enemies.Clear();
    Console.WriteLine(this.Enemies);
  }
}
---------------- Begin Game ----------------
Level 'Level' was loaded.
Loaded level 0.00s
Current Enemy Objects:
{<Cog (Sphere) [745]>}
Current Enemy Objects:
{<Cog (Sphere) [745]>, <Cog (Sphere) [746]>}
Current Enemy Objects:
{<Cog (Sphere) [745]>, <Cog (Sphere) [746]>, <Cog (Sphere) [747]>}
{}
The foreach loop handles the accessing for you. Essentially, each iteration of the loop enemy will be a reference to the next element in the array. This means you do not have to do any indexing. This means that you also have little control over the indexing. While foreach is more commonly used for full iterations over an array, for loops may be more desirable for operations which require a non-linear indexing order.
Related Materials
Manual
Tutorial
Reference
Classes
Commands
Development Task
- T1187