This lesson introduces the Zilch Engine editor and user interface. It covers editor windows such as the Objects Window, Properties Window, Library Window, Level Window, and Search Window.
Learning Objectives
- Elements and features of the #zilch_editor
- Basic #zilch_tutorials style
Tutorial Structure
In Tutorials, instructions are laid out in a specific way to make them easier to understand. For example:
- In the
Object Window- Select the Player object object
- In the
Properties Window- Add Component: RigidBody
- Under RigidBody
- Set AllowSleep button to
false
Each level of indentation represents a subsection of the window you are already in, where the base is the Editor itself. This makes it easier for you to know where to look in the editor for the information you seek. As the lessons progress some common steps will be cut for brevity, for instance:
- In the
Level Window- Press
Space- In the
Search Window- Type
CreateSprite- Press
Enter
will be shortened to: - Command: CreateSprite
This significantly reduces the amount of reading, and while still providing a reference to the full process should you need a refresher.
Create a New Project
It is recommended that you create a new project. If this is the first time you have run the Zilch Engine you will already be in the Projects screen and can simply type in a name for your project. If you are not on the new Projects screen, you can access it using the Project menu.
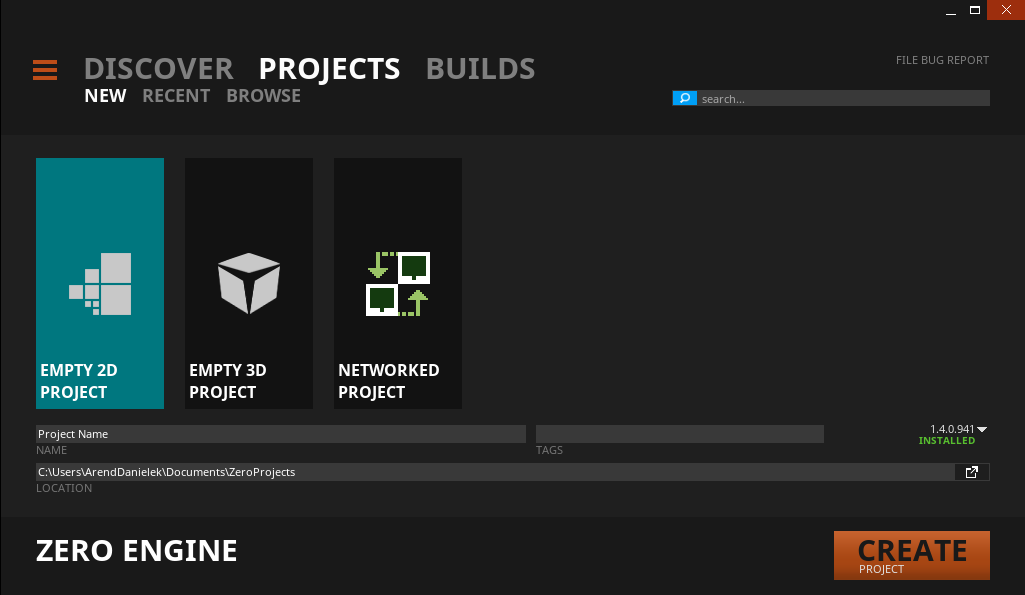
- Open the Zilch Launcher
- In the
Project Window - Select
EMPTY 2D Projecttemplate - Enter a name for the project in the Name field
- Enter a Project Folder directory (if the default is not sufficient) by either typing or left clicking the browse button on the right of the field.
- Left Click the
Create Projectbutton
Alternatively, you can create a new project from within the editor by using Command : New Project
NOTE:
Commands represent all actions you can perform as a user in the Zilch Editor. Page numbers are listed throughout the lesson for refreshing your knowledge on how to do common essential tasks. View how to enter Commands in Zilch by going to the page number provided in the tutorial!
Windows Overview
After creating a new project, the editor should look something like this:
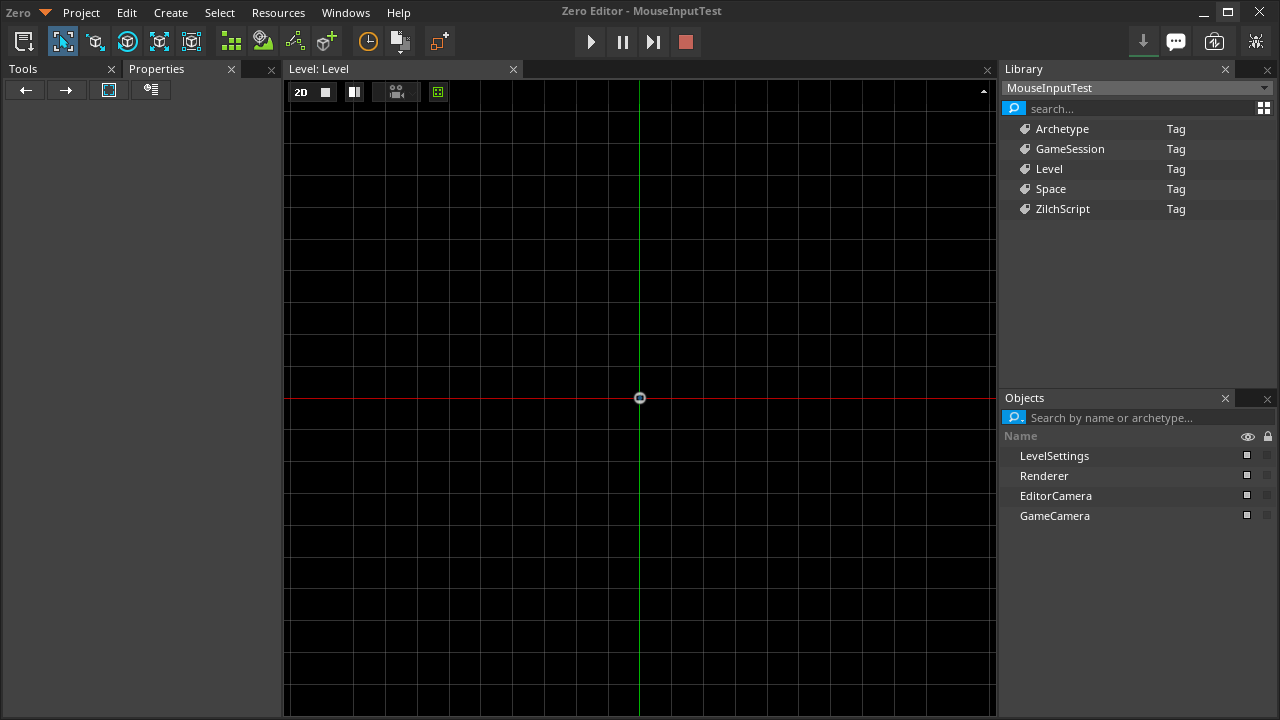
Level Window
The Level Window (located in the center of the editor as seen in the Window Overview section above) is where you will manipulate objects to build levels. The visible grid is a customizable visual to help place objects, but doesn't show in actual gameplay.

| Buttons To Alter Level View | |
|---|---|
  |
Toggles between 2D & 3D camera controls |
  |
Toggles editor camera's render mode between Orthographic and Perspective |
 |
With the camera options you can either reset the editor camera to its default settings, or align a selected camera with the editor's camera |
  |
Toggles the grid line visuals in the editor |
Objects Window
Every level contains objects. An object can represent the floor, a wall, enemies, the player, and many other things. There are a few different buttons in the Objects Window that you should know about:
- Eyeball: Toggles visibility of an object only while in the editor. Objects with the eye button disabled will be invisible in the editor, but still visible when the level is played.
- Selection Lock: The small lock button can be turned on and off to toggle the ability to select an object from within the editor.

The objects in the Objects Window can be searched by name using the search bar. Each level has four objects by default:
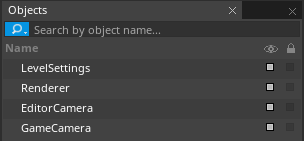
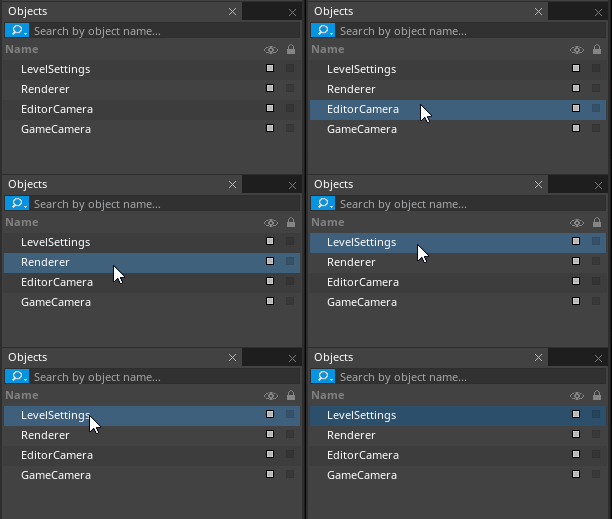
- Click on the LevelSettings object object to select it
Properties Window
When an object is selected, the properties of that object are accessible from the Properties Window.
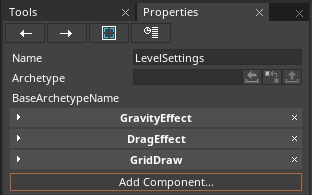
The Properties Window is the primary means for editing or building objects. An object being comprised of multiple components.
NOTE: Component is a chunk of functionality or small bucket of data. An object's behavior and purpose depends upon what components it contains. Game objects are made up of different components. More details about components will be covered in future lessons.

| Properties Navigation Buttons | |
|---|---|
  |
These arrows allow you to navigate back and forth between recently selected items that have show in the Properties Window |
 |
The Show Selection button, on first click, pans the camera to the object and on second click, zooms the camera in to frame the object in the Level Window |
 |
The Recent button pulls up a drop down list of the recently accessed items for selection |
Library Window
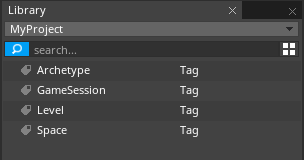
Anything you add to the game using Command : Add or through drag-and-drop importing is stored as a resource. All resources added to your project can be found in the Library Window. You'll learn more details about resources in future lessons.
Search Window
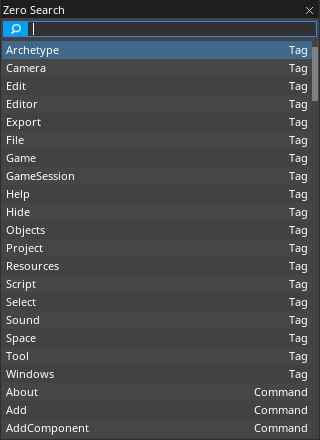
This powerful tool allows you to search nearly anything within the editor. Perhaps its most important use is executing Commands.
(NOTE) "Do This + That":
The + symbol can be read as "and" when used to describe button combinations. It means you should do all the actions "added" together simultaneously.
Press Ctrl + C to copy, would mean hold down Ctrl on your keyboard then press C to perform the copy action.
There are three ways to bring up the Zilch Search Window:
Click anywhere in the Level Window and press Space
From any window press Ctrl + Shift + Space
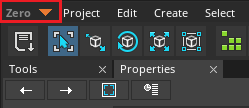
Click the Zilch Search Button in the upper left-hand corner
Reopening Windows & Docking
With its numerous commands the Search Window provides many crucial functions such as those that reopen closed windows and tabs.
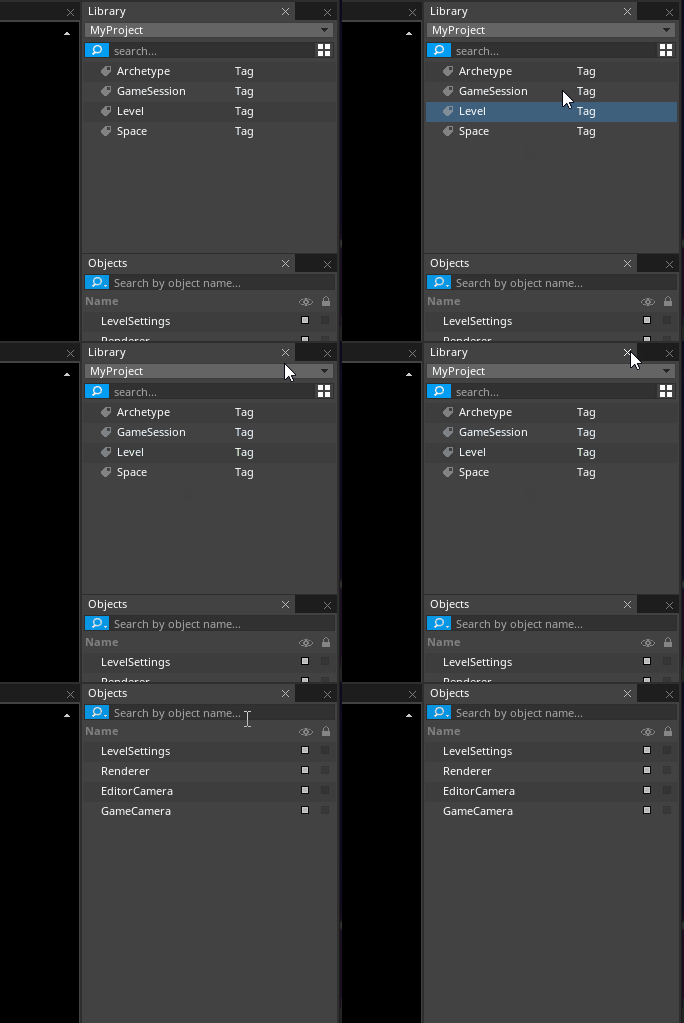
- Click the x on the Library tab to close the
Library Window:
- Press
Ctrl + Shift + Spaceto open theSearch WindowSearch for the Library command by typingLibrary, then hit enter (or click on the Library command directly) to open theLibrary Window
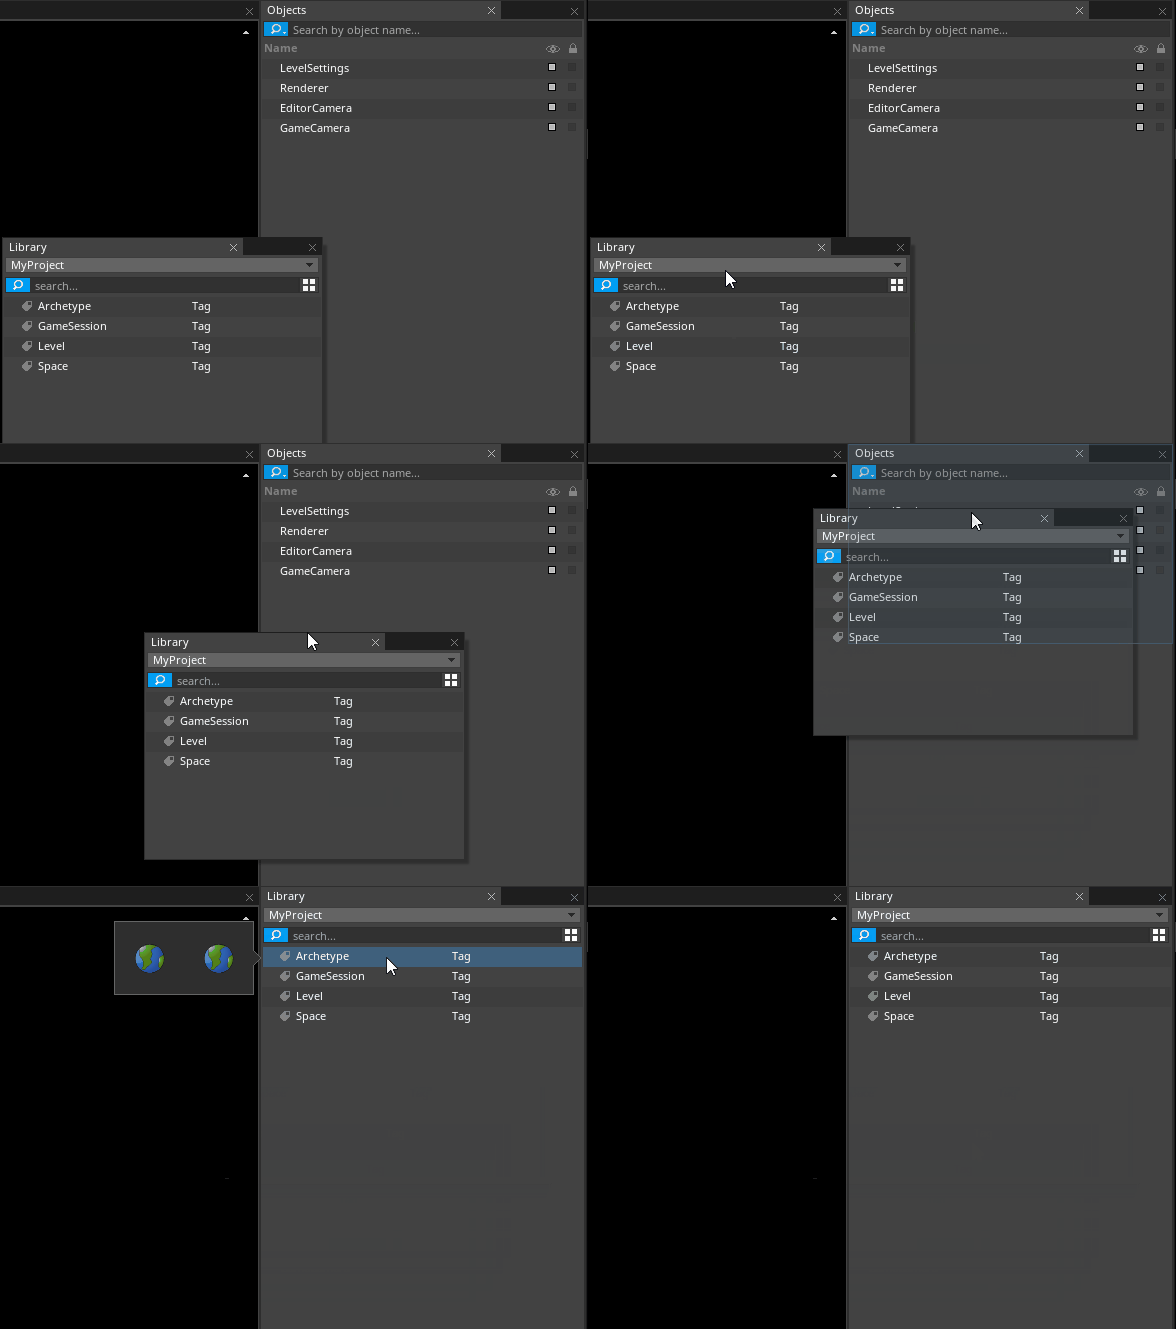
This same process can be used to reopen many of these key windows. Once reopened, you can use the drag and drop technique on the tab at the top of the window to "dock" it back into the same starting configuration. Docking locations are indicated by the editor with light blue regions as you hover over them. When you find the one you want to dock to, release the left mouse button:
Console Window
- Press the Tilde
~key to open theConsole Window

NOTE: To be "in" a window requires that the window has "focus". To gain focus you need to click on the window itself. This ensures that all your keyboard input works as intended.
- In the
Console Window- Press
Ctrl + Deleteto clear the console
- Press
- In the
Level Window- Press
Space
- Press
- Type the Command : SaveProject
- Press
EnterA message telling you the project was saved is displayed in theConsole Window. When console output is referenced in future lessons it will be shown like this:
Saved level file 'Level'.
Uploaded to archetype MyProject.Game.
Saved : Project and all scripts saved.
Game Window
The Game Window is where your game actually runs inside the Zilch Engine editor. You can test or play your game (or specific levels) here without having to create an executable.
There are multiple ways to run the game in the editor.
- Press key
F5on the keyboard - Press the Play button button in the
Tool Bar - Command : PlayGame
Project Menu > Play Game
The Game Window tab should appear in a tab next to the Level Window tab:

The Game Window should not show anything but a blank screen right now because we haven't added any visible objects to our level yet:

- Close the
Game Windowby pressing theXbutton on the Game tab - You can also press
Escor use Command: StopGame It is a good practice to close your game window promptly. Editing levels while theGame Windowis open can cause erratic behavior, undefined behavior, or errors. - Click on the Level tab to return to the
Level Window
Tools Window
This window contains several useful tools for using the Zilch Editor. These tools are for managing various objects within the level. Settings for the current tool being used are also available here. You can switch tools from the drop-down selection or by using hotkeys.
- Click anywhere in the
Level Windowthen press1on your keyboard. This is a hotkey for switching to the SelectTool.

Click on the drop-down selection in the Tools Window to display a list of tools you can use:

Tool Bar

| The Tool Bar|
| |Saves the project and all the resources in your Library|
|
 |These buttons line up with hotkeys 1-5 and they represent some of the most commonly used tools for editing objects in the
 Level Window|
| |These correspond to other, less common tools that are available|
|
 |These open windows in the Editor, such as the
 Library Window and the Add Window|
| |These buttons allow you to run your game from the current level
 F5, pause F6, step through frame by frame F7, or stop executing the game F8|
| |These link to outside resources to get content, give bug reports, and request support.|
In order to find out more about the function of each button, you can hover over them to get a pop-up tool tip.

You can reach all the same functionality by searching in the Search Window.

You may have noticed that you can play, pause, step through, and stop your game with the F5 - F8 function keys. F9, F10, and F11 are also engine specific hotkeys. F9 will open the edit in game window for the first space, allowing you to edit objects in the scene while the game is running. F10 will toggle whether the cursor is trapped, meaning it is made invisible and locked to the center of the screen. F11 toggles fullscreen mode for the currently focused window.
Menu Bar

The menu bar includes commands for project manipulation and exporting your game under File, quick create options for getting things on the screen fast under Create, and the ability to reopen closed windows via Windows.
See Executing Commands for information.