Learning Objectives
- Drawing debug primitives
Often when developing a game we may we run into data that is hard to interpret from just printing to the console. Values such as Velocity or the direction a Cog is facing are better represented visually than by numerical values. DebugDraw objects are a useful debuging technique that allows us to draw simple primitives to visually represent data in the game itself.
Level Setup
In the
Properties WindowUnder Transform
Set Translation to
[0, -2, 0]Set Scale to
[20, 1, 1]Create a NadaScript resource using the Component template template and name it
DebugLauncherUpdate the
DebugLauncherclass to the following:
class DebugLauncher : NadaComponent
{
  [Dependency] var RigidBody : RigidBody;
  [Dependency] var Transform : Transform;

  [Property]
  var Camera : CogPath = CogPath();

  var Drawing : Boolean = false;

  var Target : Real3;

  var TargetLine : DebugLine = DebugLine();

  function Initialize(init : CogInitializer)
  {
    this.TargetLine.Color = Colors.Red;
    Zilch.Connect(this.Space, Events.MouseDown, this.OnMouseDown);
    Zilch.Connect(this.Space, Events.MouseUp, this.OnMouseUp);
    Zilch.Connect(this.Space, Events.FrameUpdate, this.OnFrameUpdate);
  }

  function OnMouseDown(event : ViewportMouseEvent)
  {
    Console.WriteLine("Drawing");
    this.Drawing = true;
  }

  function OnMouseUp(event : ViewportMouseEvent)
  {
    Console.WriteLine("Not Drawing");
    this.Drawing = false;
    this.RigidBody.Velocity = this.Target - this.Transform.Translation;
  }

  function OnFrameUpdate(event : UpdateEvent)
  {
    if(!this.Drawing)
      return;

    var mouseScreenPos = Zilch.Mouse.ClientPosition;
    var mouseWorldPos = this.Camera.CameraViewport.ScreenToWorldZPlane(mouseScreenPos, 0.0);
    this.Target = mouseWorldPos;
  }
}
Notice we use FrameUpdate as opposed to LogicUpdate. Generally, debug drawing should still occur when a TimeSpace is paused, and FrameUpdate is sent every frame, whether a space is paused or not.
- Command : CreateSphere
- Add Component :
DebugLauncher - In the
Properties Window - Under
DebugLauncher - Set Camera to GameCamera object
- Command : PlayGame
Click + HoldandReleasearound on the screen above the platform
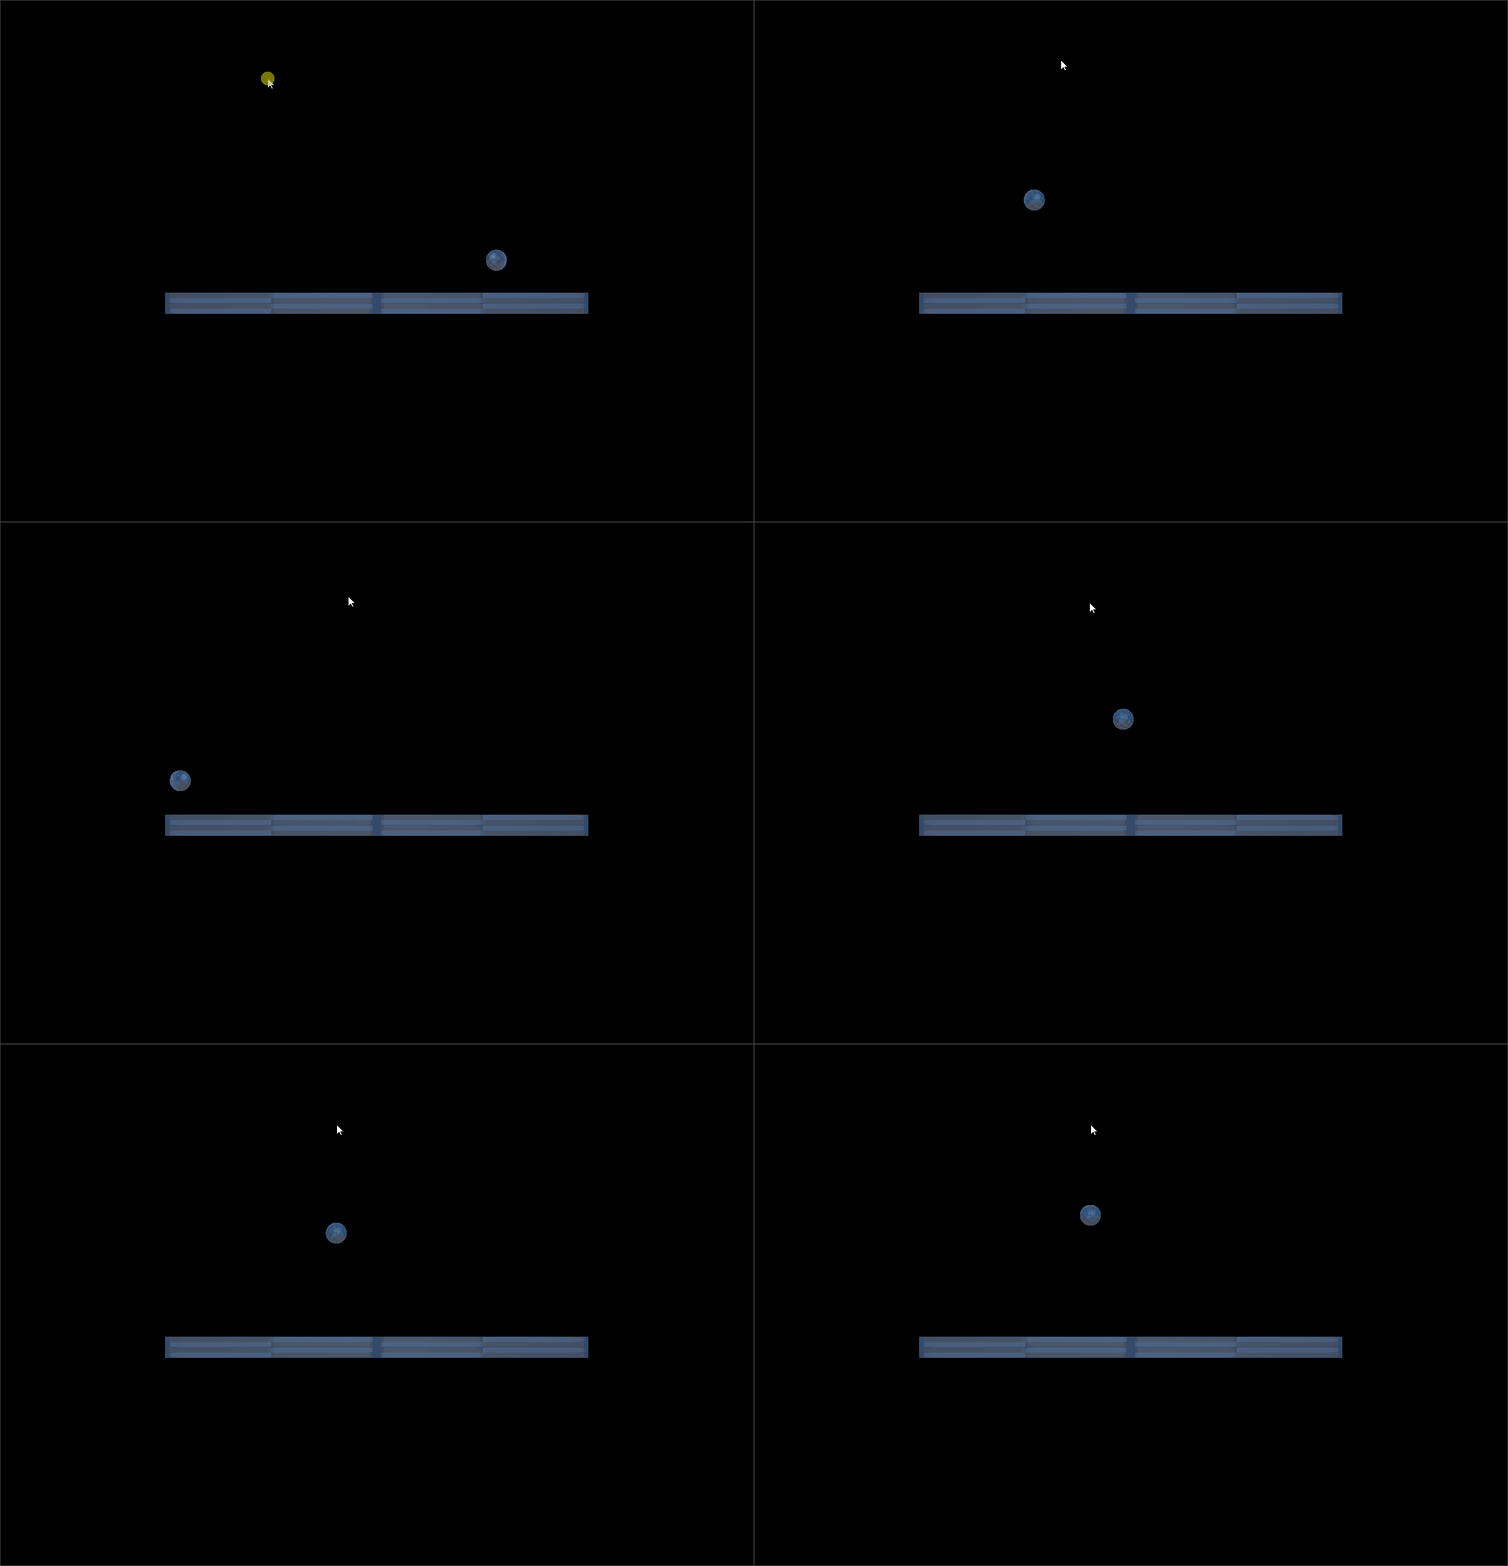
NOTE: The yellow circle overlaying the cursor is added to the image by the screen-capture program after it is captured to indicate when the mouse button is down.
We can see when the mouse button is released that the velocity of the ball is set and the ball launches towards the cursor position. This is a prime example of a physics-based behavior that can be hard to debug or tune without further visual assistance.
DebugLine
One of the most common debug draw type is DebugLine, which is actually a line segment as it has start and end points.
- Add the following to the
DebugLauncherclass:
function DrawDebug()
{
  this.TargetLine.Start = this.Transform.Translation;
  this.TargetLine.End = this.Target;
  DebugDraw.Add(this.TargetLine);
}
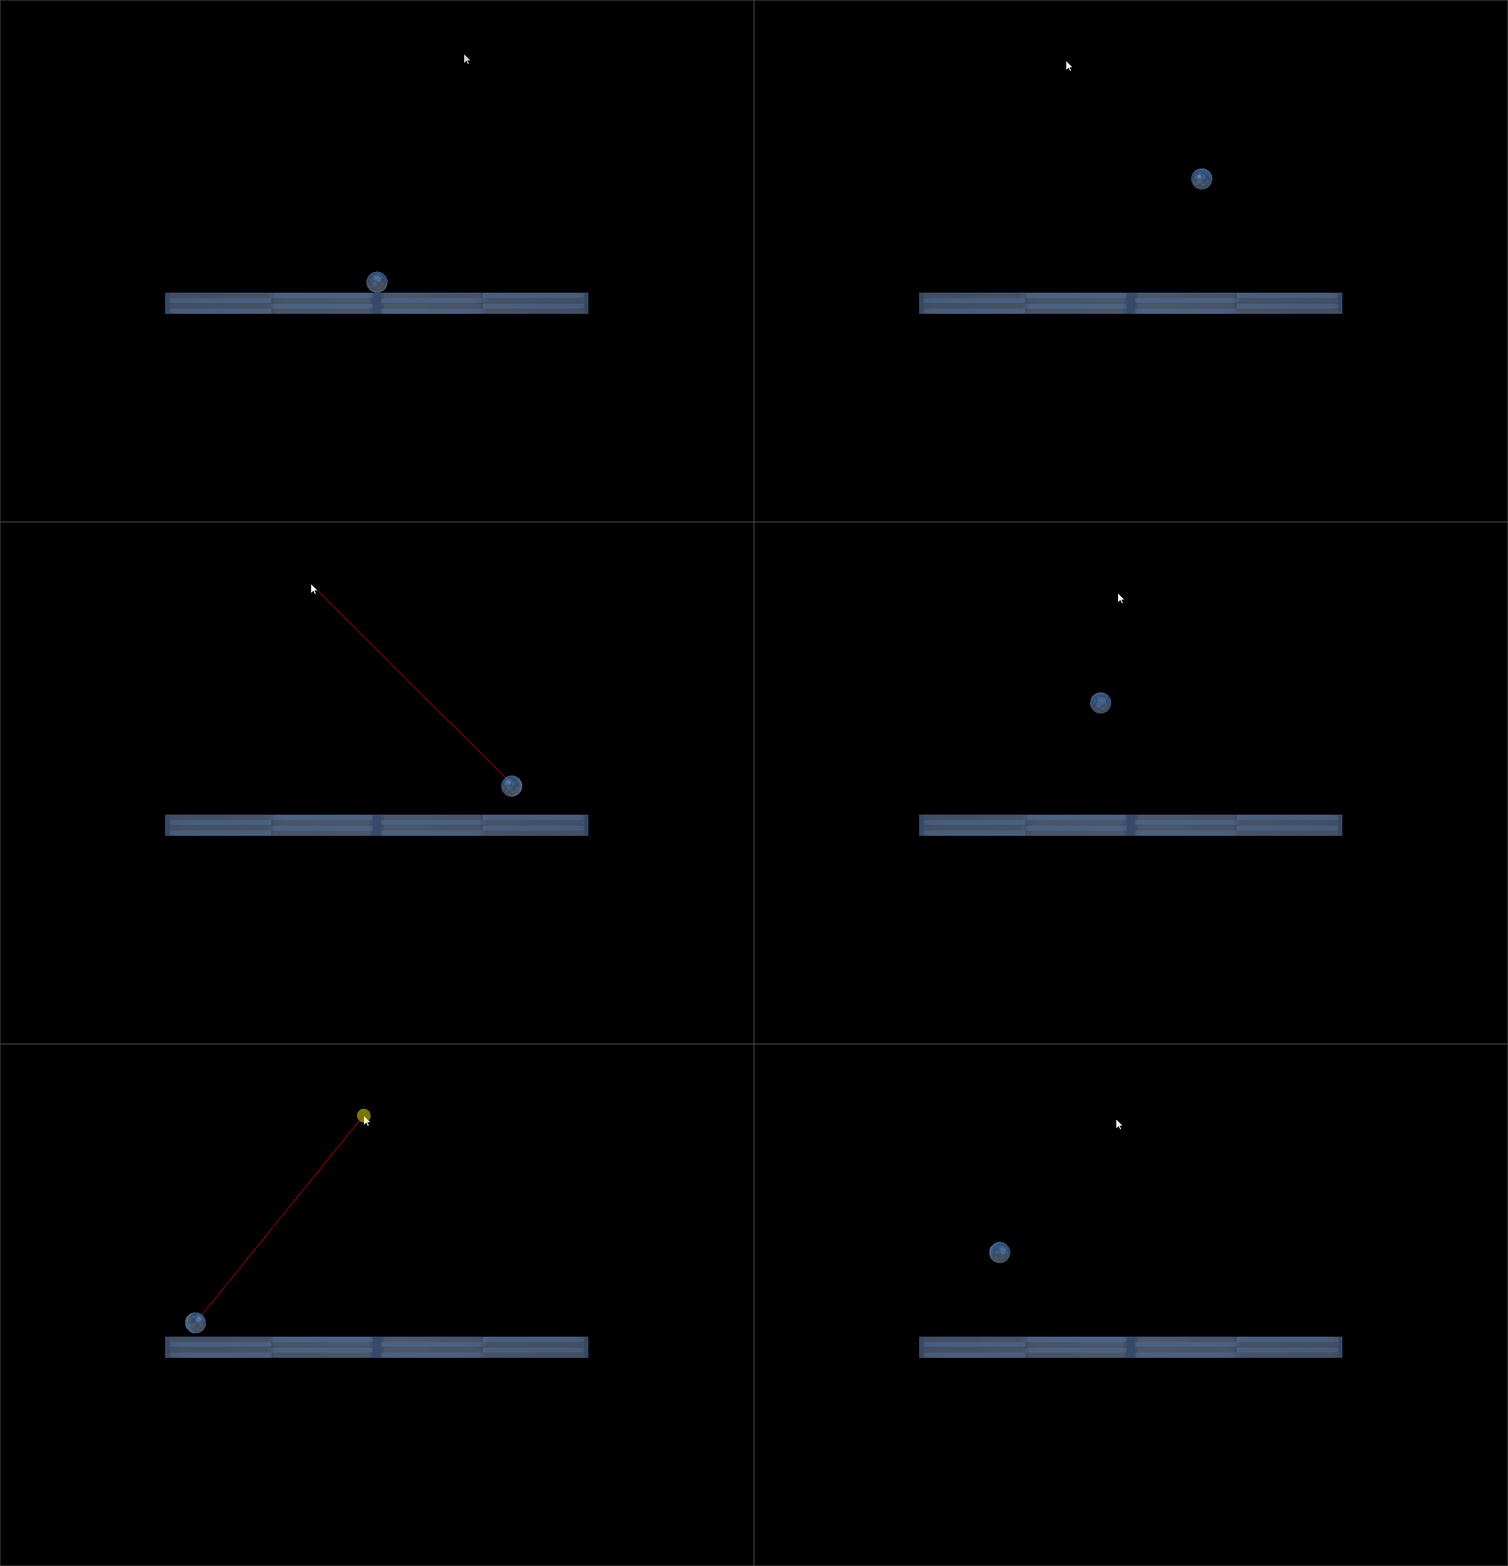
Here we configure the debug line for the current frame by setting a start and end point for the segment. The final line of code DebugDraw.Add(this.TargetLine); adds this.TargetLine to a list of debug objects which should be drawn that frame. This means that debug object must be passed to DebugDraw.Add each frame they should be drawn.
- Add the following to the
OnFrameUpdatefunction in theDebugLauncherclass:
this.DrawDebug();
Calling our DrawDebug function every frame that the mouse is down allows our drawing of the line segment to be reactive to when we want to communicate the information about the launch velocity. Integrating debug drawing into functionality you are implementing is a fairly common task.
DebugCircle
There are many types that can be debug drawn, as can be seen in the Related MaterialsDebugCircle, which will be used to make a clock.
- Command : Add Resource
- Create a NadaScript resource using the Component template template and name it
DebugClock - Update the
DebugClockclass to the following:
class DebugClock : NadaComponent
{
  [Dependency] var Transform : Transform;

  [Property]
  var ClockRadius : Real = 5.0;

  var Circle : DebugCircle = DebugCircle();

  function Initialize(init : CogInitializer)
  {
    this.Circle.Position = this.Transform.Translation;
    this.Circle.Radius = this.ClockRadius;
    this.Circle.Color = Colors.Blue;

    Zilch.Connect(this.Space, Events.FrameUpdate, this.OnFrameUpdate);
  }

  function OnFrameUpdate(event : UpdateEvent)
  {
    this.DrawClockFrame();
  }

  function DrawClockFrame()
  {
    DebugDraw.Add(this.Circle);
  }
}
Add Component :
DebugClock
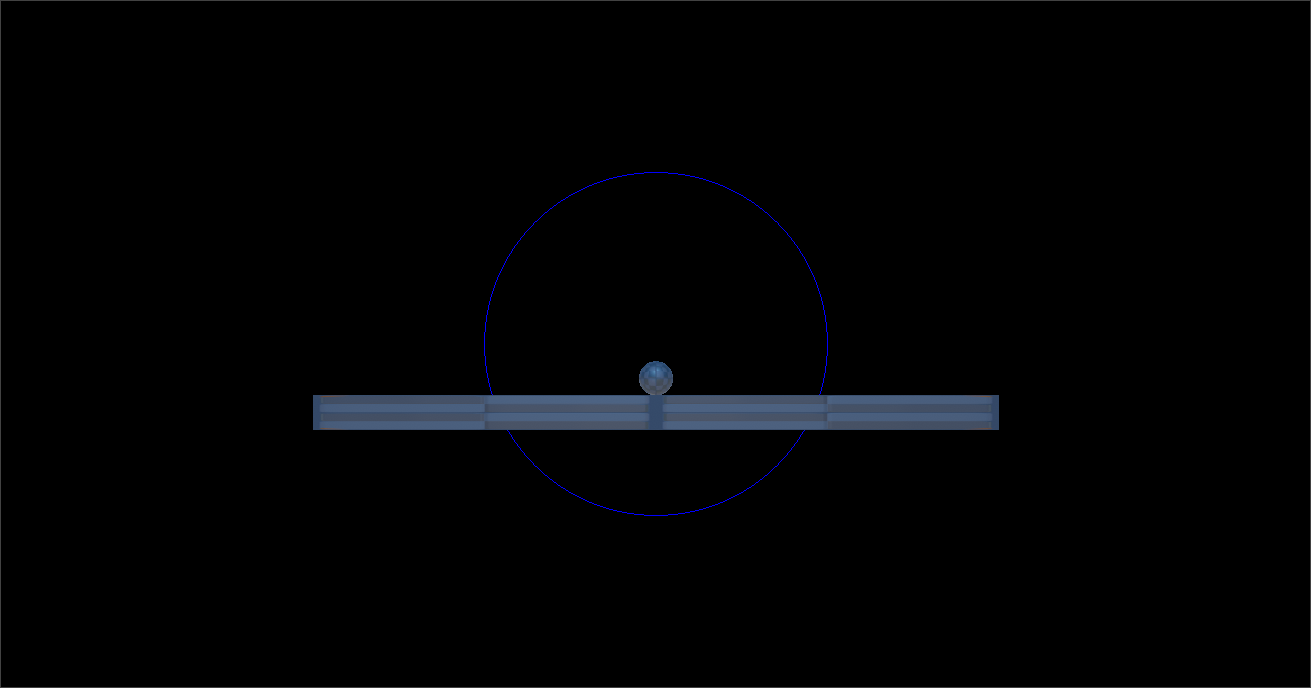
We can see the DebugCircle being drawn in the background now. Just like we set the color of the line we can set the color of the circle.
[Property]
var SecondHandRadius : Real = 3.0;

[Property]
var MinuteHandRadius : Real = 4.0;

[Property]
var StartAngleOffset : Real = 90.0;

[Property]
var CounterClockWise : Boolean = false;

var MinuteHand : DebugLine = DebugLine();
var SecondHand : DebugLine = DebugLine();

var Timer : Real = 0.0;
var Minutes : Real = 0;
var Seconds : Real = 0;
Here we define the data necessary to draw the hands of the clock.
- Replace the
Initializefunction in theDebugClockclass with the following:
function Initialize(init : CogInitializer)
{
  this.SecondHand.Start = this.Transform.Translation;
  this.SecondHand.Color = Colors.Red;
  this.MinuteHand.Start = this.Transform.Translation;
  this.MinuteHand.Color = Colors.Green;
  this.Circle.Position = this.Transform.Translation;
  this.Circle.Radius = this.ClockRadius;
  this.Circle.Color = Colors.Blue;

  Zilch.Connect(this.Space, Events.FrameUpdate, this.OnFrameUpdate);
}
Unlike the DebugLauncher the start position of the lines are not changing so we can set up the start position of all the debug elements in Initialize. Now that the initial data has been defined let's implement the calculations for the rest or the line data.
- Add the following to the functions in the
DebugClockclass:
function DrawSecondHand()
{
  //Calculate what percentage of the current minute has passed
  this.Seconds = this.Timer % 60.0;
  var percCurrentMin = this.Seconds / 60.0;

  //Calculate the angle of the seconds hand
  var angle = (2*Math.Pi) * percCurrentMin;
  if(!this.CounterClockWise)
    angle *= -1.0;

  //Offset the starting angle so the hand starts at the top of the clock
  angle += Math.ToRadians(this.StartAngleOffset);
  var dir = Real3(Math.Cos(angle), Math.Sin(angle), 0.0);

  //Calculate the endpoint of the seconds hand line segment based off the calculated angle
  this.SecondHand.End = this.Transform.Translation + (dir * this.SecondHandRadius);
  DebugDraw.Add(this.SecondHand);
}

function DrawMinuteHand()
{
  //Calculate what percentage of the current hour has passed
  this.Minutes = this.Timer / 60.0;
  var perc = this.Minutes / 60.0;

  //Calculate the angle of the minutes hand
  var angle = (2*Math.Pi) * perc;
  if(!this.CounterClockWise)
    angle *= -1.0;

  //Offset the starting angle so the hand starts at the top of the clock
  angle += Math.ToRadians(this.StartAngleOffset);
  var dir = Real3(Math.Cos(angle), Math.Sin(angle), 0.0);

  //Calculate the endpoint of the minute hand line segment based off the calculated angle
  this.MinuteHand.End = this.Transform.Translation + (dir * this.MinuteHandRadius);
  DebugDraw.Add(this.MinuteHand);
}
Every frame we need to call the function we just wrote to draw each part of the clock as well as increment the timer.
- Replace the
OnFrameUpdatefunction in theDebugClockclass with the following:
function OnFrameUpdate(event : UpdateEvent)
{
  this.DrawSecondHand();
  this.DrawMinuteHand();
  this.DrawClockFrame();
  this.Timer += event.Dt;
}
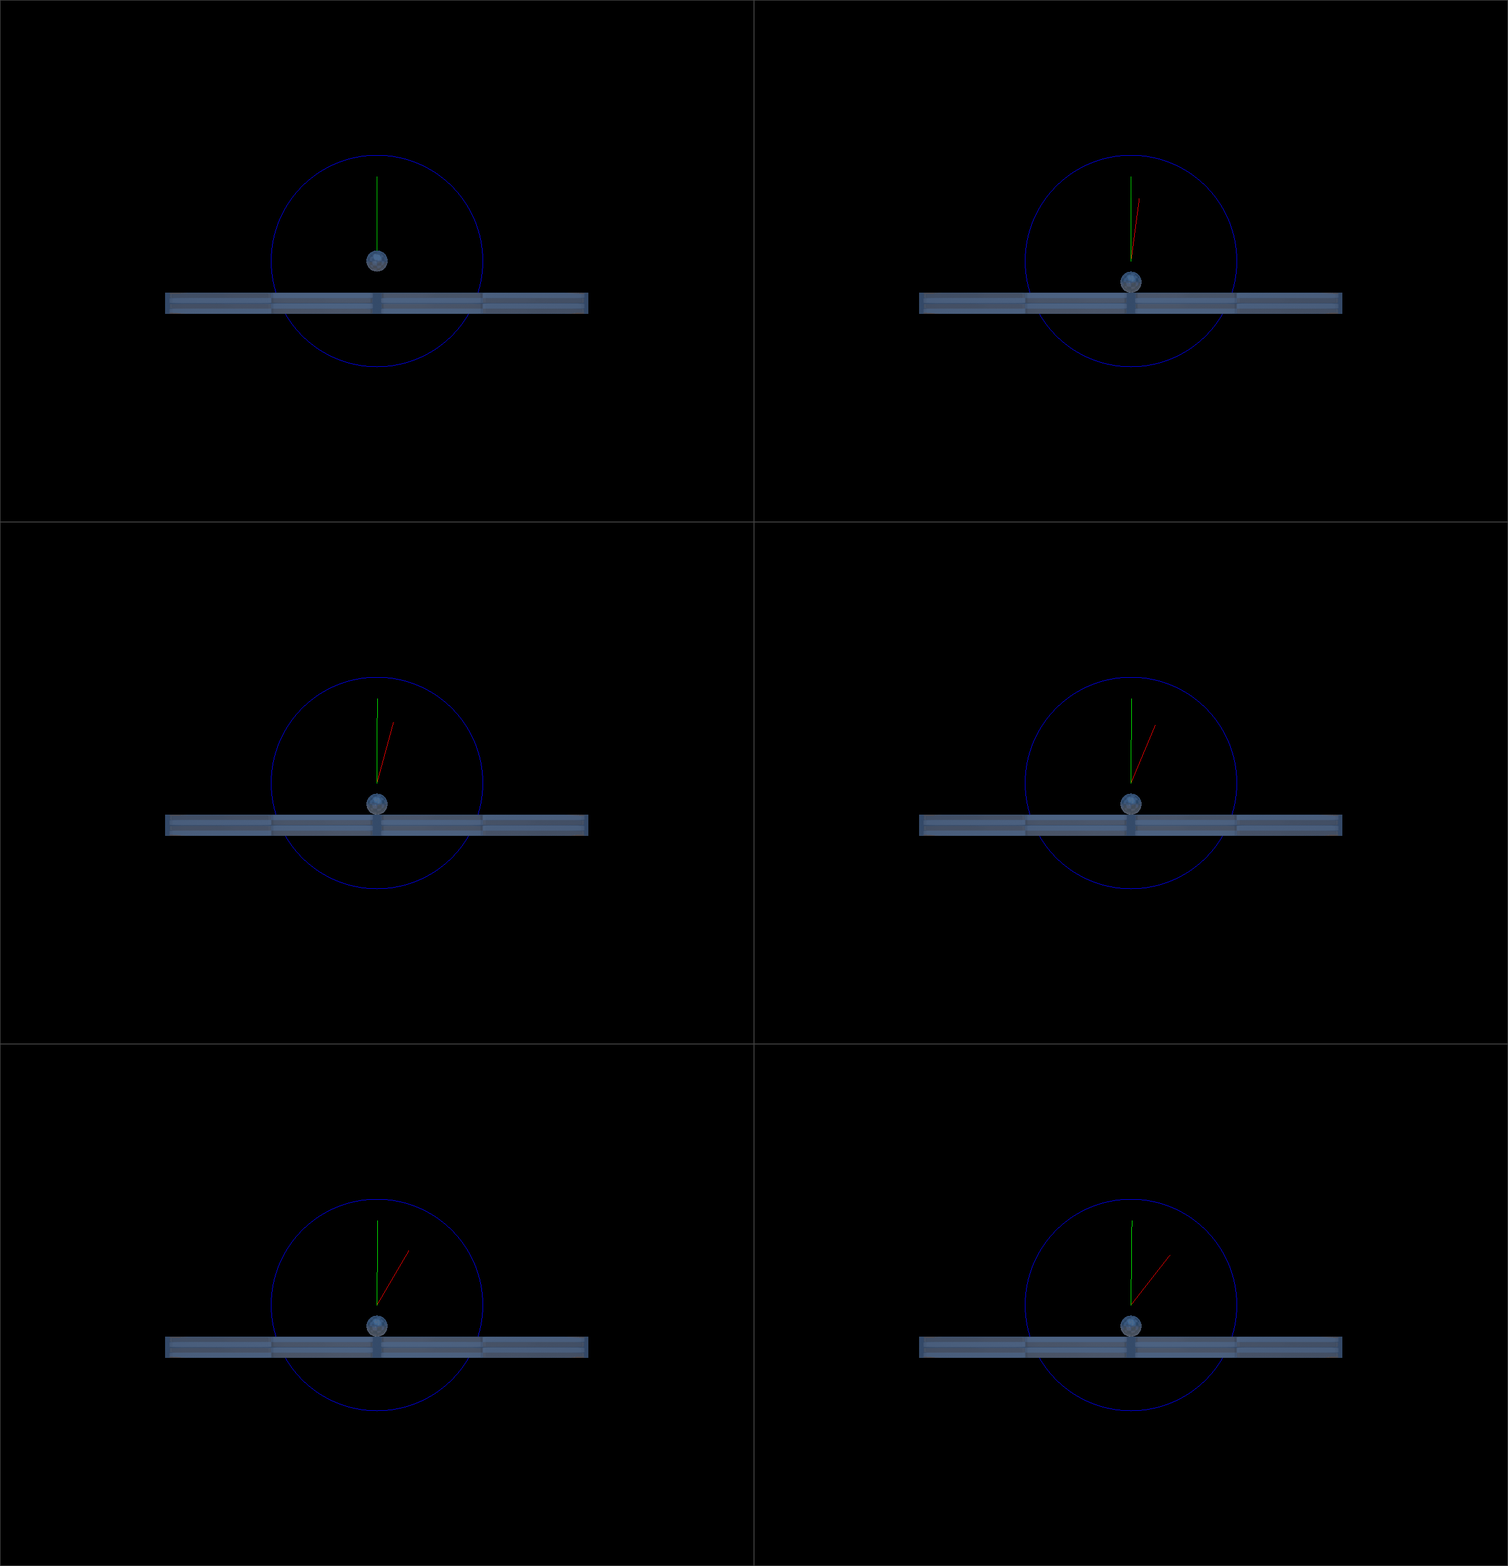
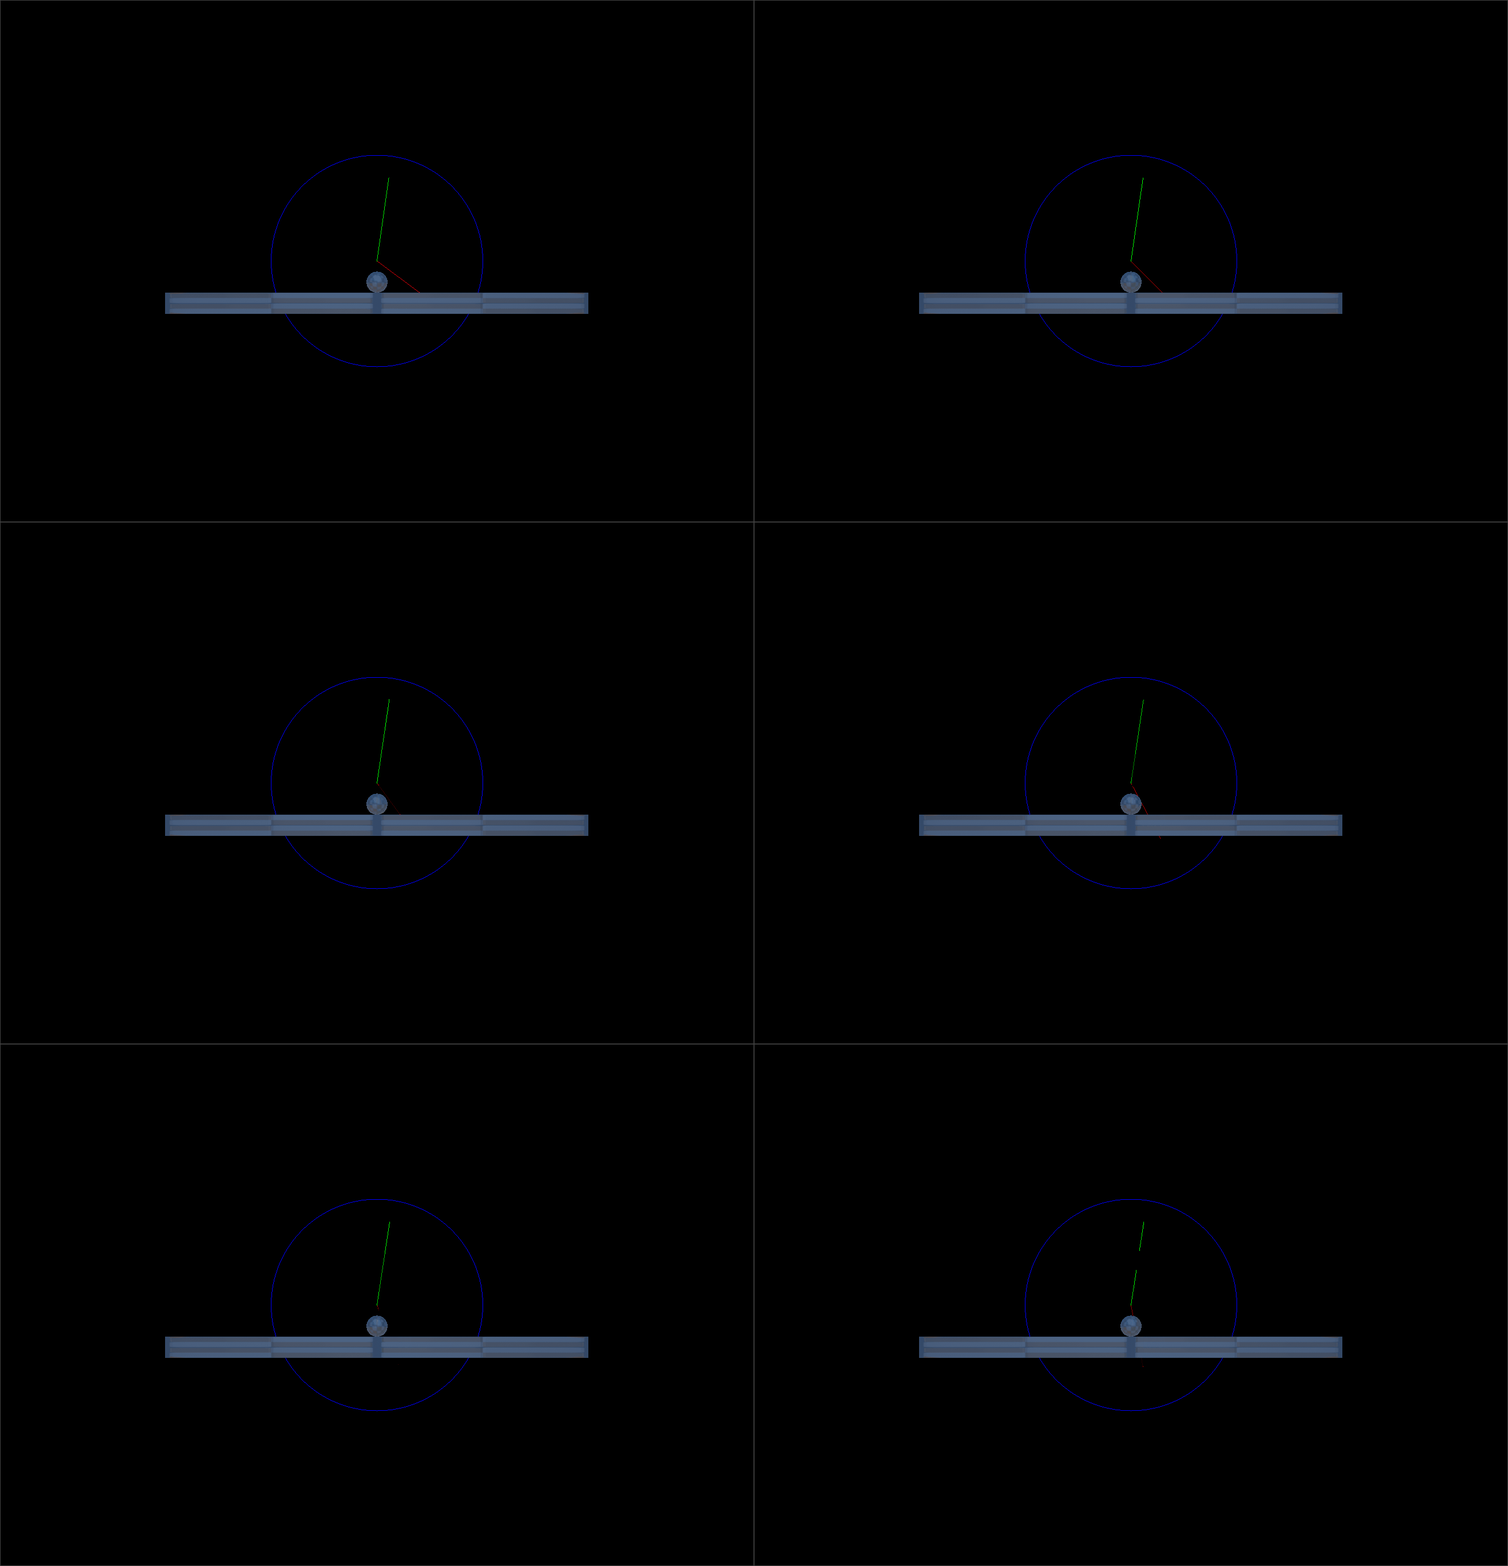
Here we see the clock in motion at different point in it's cycle
Now we know how to debug draw simple objects. Let's look at a more complicated built-in example.
VortexEffect
- Command : CreateTransform
- In the
Properties Window - Add Component : VortexEffect
- Under Transform
- Set Translation to
[0,5,0] - Under VortexEffect
- Set VortexAxis to
[0,0,1]
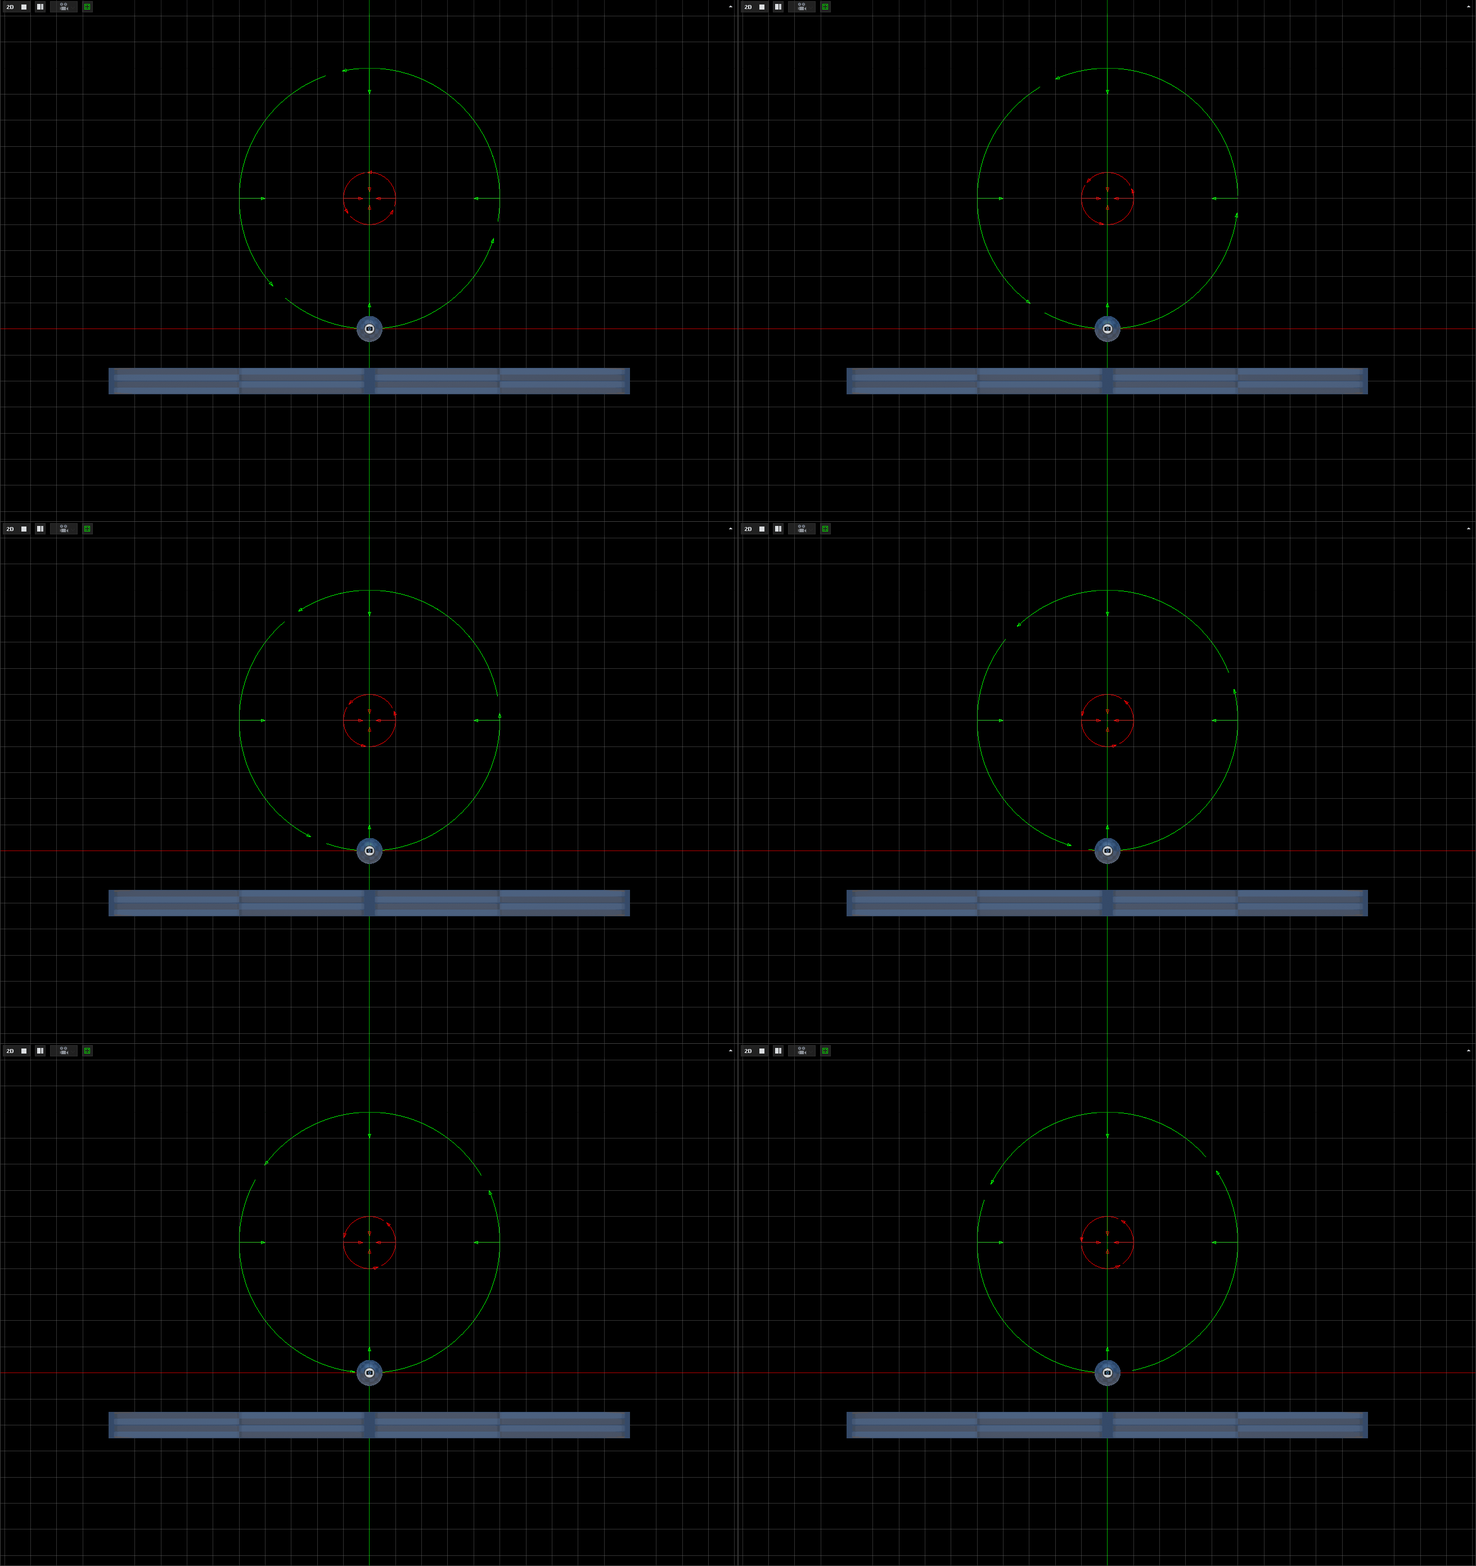
Here is an example of a built-in debug draw effect in action. You actually see debug drawing everytime you use and editor tool; PhysicsEffect components just offer a more complex example. In the case of the VortexEffect multiple DebugArc objects are drawn indicating the direction and speed of the vortex, while DebugLine objects are used to show that the component is pulling objects into the vortex as opposed to throwing them out.
Related Materials
Manual
Tutorial
Reference
Classes
- Cog
- Console
- RigidBody
- DebugArc
- DebugBox
- DebugCapsule
- DebugCircle
- DebugCone
- DebugCylinder
- DebugFrustum
- DebugLine
- DebugLineCross
- DebugObb
- DebugSphere
- DebugText
- DebugTriangle
- VortexEffect
Commands
Development Task
- T1343