This lesson discusses audio in the Zilch Engine.
(NOTE) You will need speakers, headphones, or some other audio output device for this lesson.
Learning Objectives
- The soundemitter interface
- The soundspace interface
- soundinstance
Level Setup
- Command : New Project
- Create a new project using the {nav icon=clone, name=Empty 2D Project} template
- Download the following files:
- Import them into the project by dragging and dropping the files into the
Level Window - In the
Group Import Options Window - Set GenerateCue enum to
PerSound - Press the
Import Allbutton - In the
Library Window - Under the SoundCue tag
- Double-click the
BG_ArpeggiosSoundCue - In the
Properties Window - Set PlayMode enum to
Looping - Select : GameCamera object
- In the
Properties Window - Under Transform
- Set Translation to
[0, 0, 3] - Under Camera
- Set Size to
40
SoundEmitter
There are a few different ways to play sounds in the Zilch Engine. One is by using a SoundEmitter. The SoundEmitter component is used to play SoundCues //positionally//: that is, as if they were to occur in the world with the rest of the game. Using positional audio, it is possible to create, for example, an explosion effect that is louder or softer, and will sound like it occurs to the left or right of the player, depending on where it goes off.
Let's do that now.
The PlayCue Function
- Command : Add Resource
- Create a NadaScript resource using the Component template template and name it
KeyboardMovement - Update
KeyboardMovementto the following:
class KeyboardMovement : NadaComponent
{
  [Dependency] var Transform : Transform;

  [Property]
  var Speed : Real = 20.0;

  function Initialize(init : CogInitializer)
  {
    Zilch.Connect(this.Space, Events.LogicUpdate, this.OnLogicUpdate);
  }

  function OnLogicUpdate(event : UpdateEvent)
  {
    var movement = Real3.Zero;

    if (Zilch.Keyboard.KeyIsDown(Keys.Right))
      movement += Real3.XAxis;
    if (Zilch.Keyboard.KeyIsDown(Keys.Left))
      movement -= Real3.XAxis;
    if (Zilch.Keyboard.KeyIsDown(Keys.Up))
      movement += Real3.YAxis;
    if (Zilch.Keyboard.KeyIsDown(Keys.Down))
      movement -= Real3.YAxis;

    movement = Math.Normalize(movement) * this.Speed * event.Dt;
    this.Transform.WorldTranslation += movement;
  }
}
- Command : CreateSprite
- In the
Properties Window - Set Name to
Player - Under Sprite
- Set SpriteSource enum to
Circle - Set VertexColor to
[R:30, G:150, B:230, A:1.00] - Add Component :
KeyboardMovement
In order for a sound played by a SoundEmitter to be heard, it needs to be picked up by a SoundListener. The GameCamera object object has a SoundListener component. To make the sound effects sound like they're coming from different sides of the player, we can parent the camera to the player so that it automatically follows the player around.
- Attach GameCamera object to Player object
- Command : Add Resource
- Create a NadaScript resource using the Component template template and name it
SoundController - Update
SoundControllerto the following:
class SoundController : NadaComponent
{
  [Dependency]
  var SoundEmitter : SoundEmitter;

  [Property]
  var ExplosionCue : SoundCue = SoundCue.SFX_Explosion;

  function Initialize(init : CogInitializer)
  {
    Zilch.Connect(this.Space, Events.LogicUpdate, this.OnLogicUpdate);
  }

  function OnLogicUpdate(event : UpdateEvent)
  {
    if (Zilch.Keyboard.KeyIsPressed(Keys.Space))
      this.SoundEmitter.PlayCue(this.ExplosionCue);
  }
}
- Command : CreateSprite
- In the
Properties Window - Set Name to
Speaker - Under Transform
- Set Translation to
[0, 3, 0] - Under Sprite
- Set VertexColor to
[R:230, G:60, B:60, A:1.00] - Add Component :
SoundEmitter - Under SoundEmitter
- Set Attentuator enum to
DefaultAttenuation - Add Component :
SoundController

- Command : PlayGame
- Hold key the
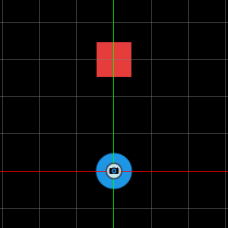
Arrowkeys to move the player around, and press key theSpacebar to play the explosion sound

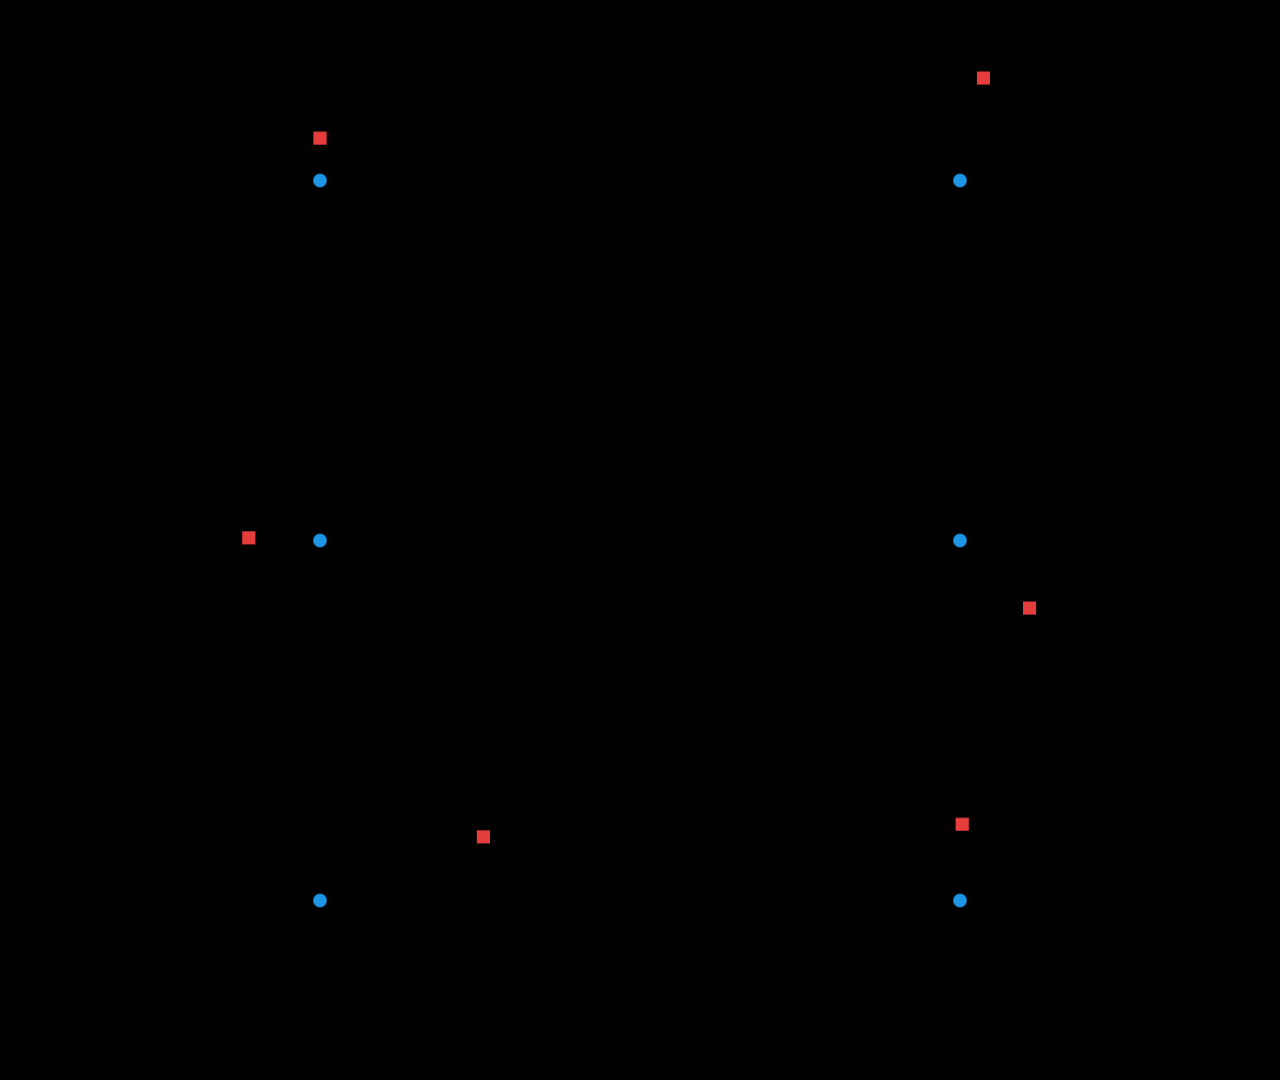
If you press Space, the speaker plays an explosion sound. If you're on the right side of the speaker, the sound comes from your left, and if you're on the left side, it comes from your right. If you're near the speaker, the explosion sound is louder than if you're far from it.
The Volume Property
Every sound played by a SoundEmitter is played at the volume level specified by its Volume property. Let's play around a bit with that.
- Add the following to the
OnLogicUpdatefunction of theSoundControllerclass:
if (Zilch.Keyboard.KeyIsDown(Keys.LeftBracket))
{
  this.SoundEmitter.Volume -= event.Dt;
  Console.WriteLine("Current Volume: `this.SoundEmitter.Volume`");
}

if (Zilch.Keyboard.KeyIsDown(Keys.RightBracket))
{
  this.SoundEmitter.Volume += event.Dt;
  Console.WriteLine("Current Volume: `this.SoundEmitter.Volume`");
}
- Command : Console
- Command : PlayGame
- Press key the
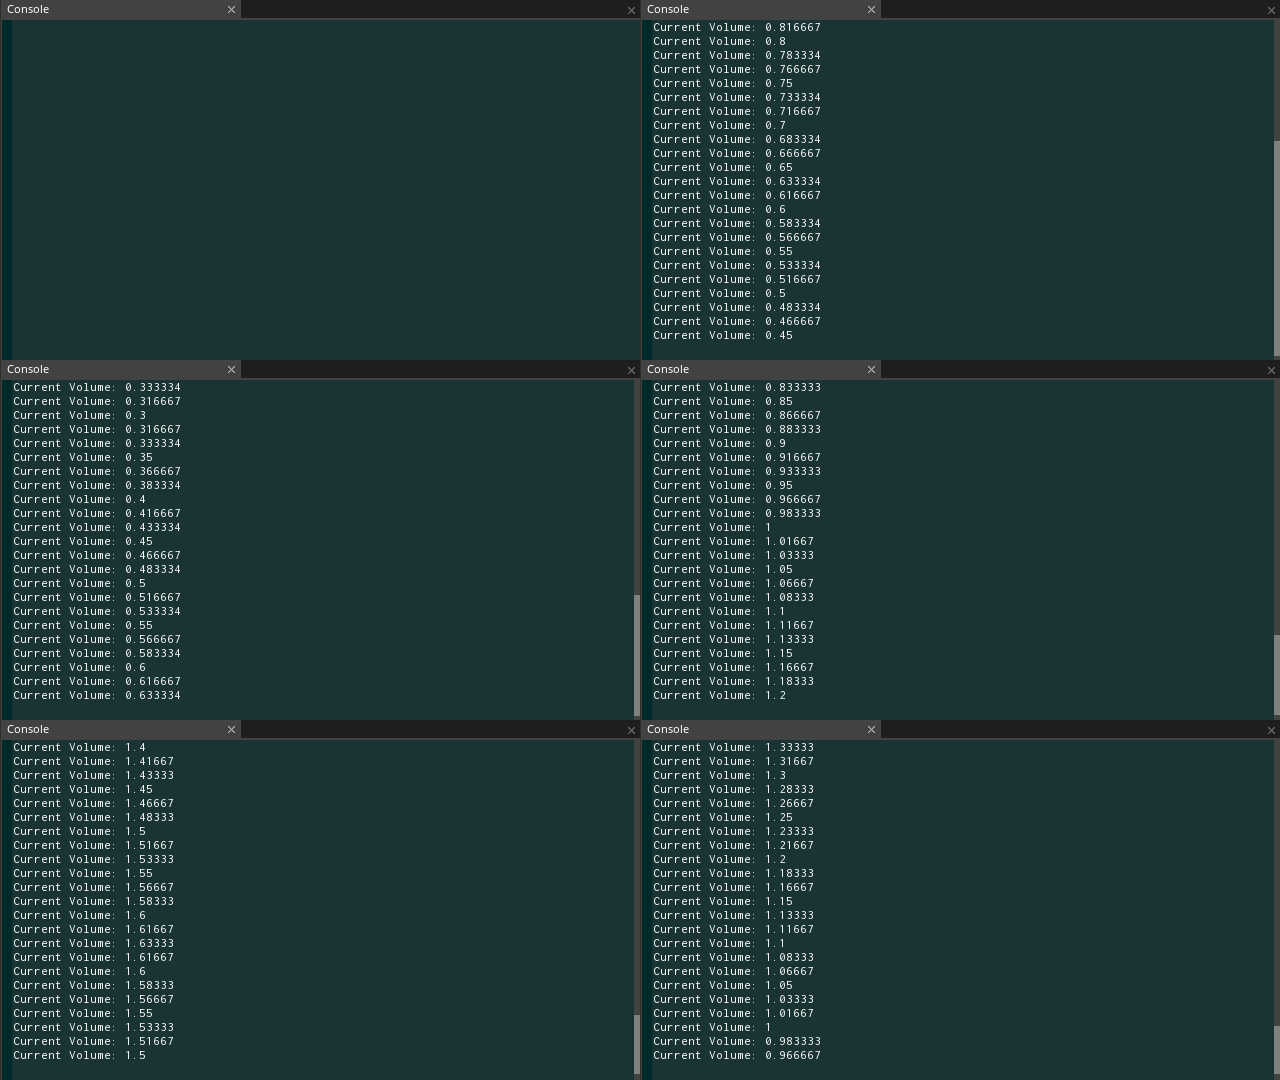
Spacebar to play the explosion sound, and hold key the[and]keys to decrease and increase the SoundEmitter's volume

The console shows the changes to the emitter's volume level
The volume level of the SoundEmitter can now be controlled, in addition to any attenuation that may occur when moving closer to or further from the speaker.
What if we want to modify the volume of a SoundEmitter gradually over time, but we want it to happen automatically, without having to hold keys on the keyboard? We've already covered Actions: we could use an Action to interpolate the SoundEmitter's Volume property, but as it happens, SoundEmitter has a handy function for just such an occasion.
The InterpolateVolume Function
- Replace the
OnLogicUpdatefunction of theSoundControllerclass with the following:
function OnLogicUpdate(event : UpdateEvent)
{
  if (Zilch.Keyboard.KeyIsPressed(Keys.Space))
    this.SoundEmitter.PlayCue(this.ExplosionCue);

  if (Zilch.Keyboard.KeyIsPressed(Keys.LeftBracket))
    this.SoundEmitter.InterpolateVolume(0, 3);

  if (Zilch.Keyboard.KeyIsPressed(Keys.RightBracket))
    this.SoundEmitter.InterpolateVolume(1, 3);
}
- Command : PlayGame
Repeatedly presstheSpacebar to play the explosion sound, and press key the[and]keys to interpolate the SoundEmitter's volume
Now it just takes one press of the [ and ] keys to gradually fade the SoundEmitter's volume level down and up, respectively.
For positional sounds, a SoundEmitter is the way to go, but sometimes audio shouldn't be played positionally. Music, for example, is usually played at a consistent volume level that is independent of the game world, and many sound effects are as well. To make a sound play non-positionally, we'll have to take a look at the SoundSpace.
SoundSpace
A previous tutorial mentioned the concept of the Space. A space has a few unique components that subdivide its responsibility into different areas. To that end, the soundspace is "in charge" of any sound that occurs in a space. That is, a SoundListener in one space won't "hear" anything played by a SoundEmitter in another space, because the listener and the emitter are controlled by different SoundSpaces.
The SoundSpace manages all sounds played in a space, but it can also be used to play sounds directly. Let's use the SoundSpace to play some music.
- Command : Add Resource
- Create a NadaScript resource using the Component template template and name it
MusicPlayer - Update
MusicPlayerto the following:
class MusicPlayer : NadaComponent
{
  [Property]
  var MusicCue : SoundCue = SoundCue.BG_Arpeggios;

  function Initialize(init : CogInitializer)
  {
    this.Space.SoundSpace.PlayCue(this.MusicCue);
  }
}
- Select : LevelSettings object
- In the
Properties Window - Add Component :
MusicPlayer - Command : PlayGame
Notice how moving the player around has no effect on the volume level of the music, because it's playing directly through the SoundSpace, not a SoundEmitter. It might be a little bit too loud, though. That's easy to fix because the volume level of the SoundSpace can be controlled just like the volume of a SoundEmitter.
class MusicPlayer : NadaComponent
{
  [Property]
  var MusicCue : SoundCue = SoundCue.BG_Arpeggios;

  function Initialize(init : CogInitializer)
  {
    this.Space.SoundSpace.PlayCue(this.MusicCue);

    Zilch.Connect(this.Space, Events.LogicUpdate, this.OnLogicUpdate);
  }

  function OnLogicUpdate(event : UpdateEvent)
  {
    if (Zilch.Keyboard.KeyIsDown(Keys.Minus))
    {
      this.Space.SoundSpace.Volume -= event.Dt;
      Console.WriteLine("Music Volume: `this.Space.SoundSpace.Volume`");
    }

    if (Zilch.Keyboard.KeyIsDown(Keys.Equal))
    {
      this.Space.SoundSpace.Volume += event.Dt;
      Console.WriteLine("Music Volume: `this.Space.SoundSpace.Volume`");
    }
  }
}
- Command : PlayGame
- Press key the
Spacebar to play the explosion sound, and hold key the-and=keys to decrease and increase the SoundSpace's volume
Now you can control the volume level of the output of the SoundSpace, but the volume of the explosion sound is affected too. This is because the SoundSpace applies its volume to every sound that plays in its space, whether positionally or not. There are a few different ways to control just the volume of an individual music cue (or any other SoundCue played non-positionally). Let's look at one of them.
SoundInstances
A SoundInstance is a class object that represents a specific occurrence of a SoundCue being played. It can be manipulated in Nada, where its interface is very similar to those of both the SoundEmitter and SoundSpace components.
- Update
MusicPlayerto the following:
class MusicPlayer : NadaComponent
{
  [Property]
  var MusicCue : SoundCue = SoundCue.BG_Arpeggios;

  var MusicInstance : SoundInstance;

  function Initialize(init : CogInitializer)
  {
    this.MusicInstance = this.Space.SoundSpace.PlayCue(this.MusicCue);

    Zilch.Connect(this.Space, Events.LogicUpdate, this.OnLogicUpdate);
  }

  function OnLogicUpdate(event : UpdateEvent)
  {
    if (Zilch.Keyboard.KeyIsDown(Keys.Minus))
    {
      this.MusicInstance.Volume -= event.Dt;
      Console.WriteLine("Music Volume: `this.MusicInstance.Volume`");
    }

    if (Zilch.Keyboard.KeyIsDown(Keys.Equal))
    {
      this.MusicInstance.Volume += event.Dt;
      Console.WriteLine("Music Volume: `this.MusicInstance.Volume`");
    }
  }
}
Note how the MusicInstance member variable is used: the SoundSpace's PlayCue function actually returns a SoundInstance, but we didn't hang onto it before because we didn't need it. Now that we do want to use it, we can store it as a member and work with it later.
- Command : PlayGame
- Press key the
Spacebar to play the explosion sound, and hold key the-and=keys to decrease and increase the music's volume
These changes allow us to alter the music's volume independently from the volume of the sound effects.
Related Materials
Tutorials
Manual
Reference
Classes
Events
Commands
Development Task
- {T1211}