This tutorial covers custom events in Zilch Engine.
Learning Objectives
- Custom events
- The sends keyword
- Event dispatching
- Custom event data
While the most common events are built in, there are times when you will need to create your own events based on things that happen within your own game logic. They are especially useful if multiple components connect to the same event, causing multiple unique responses. This tutorial continues with the project started in the previous Events tutorial.
Level Setup
- Reopen the Events zero project project from the previous tutorial
Declaring Custom Events
Just as instances of the class CollisionEvent are dispatched with multiple event IDs (CollisionStarted, CollisionPersisted, CollisionEnded), you may register an event class as multiple custom events. Data may be sent along with a custom event (using a custom event class, discussed below), but this isn't always necessary; if no data is needed, the event can just use the type NadaEvent.
The sends Keyword
- Command : Add Resource
- Create a NadaScript resource using the Component template template and name it
CreateObjectOnInput - Update the
CreateObjectOnInputscript to the following:
class CreateObjectOnInput : NadaComponent
{
  sends CreateObject : NadaEvent;

  [Property]
  var CreateObjectKey : Keys = Keys.Space;

  var CooldownTimer : Real = 0;
  var CooldownDuration : Real = 0.25;

  function Initialize(init : CogInitializer)
  {
    Zilch.Connect(this.Space, Events.LogicUpdate, this.OnLogicUpdate);
  }

  function OnLogicUpdate(event : UpdateEvent)
  {
    this.CooldownTimer -= event.Dt;

    if (this.CooldownTimer <= 0)
    {
      this.CooldownTimer = 0;

      if (Zilch.Keyboard.KeyIsDown(this.CreateObjectKey))
      {
        this.Owner.DispatchEvent(Events.CreateObject, NadaEvent());

        this.CooldownTimer = this.CooldownDuration;
      }
    }
  }
}
- Select : Player object
- In the
Properties Window- Add Component :
CreateObjectOnInput
- Add Component :
The first part of this script that should be new is the line with the sends keyword. If you recall from the previous events tutorial, the second parameter in the Zilch.Connect function is a String ID that identifies the event. The sends keyword defines this ID, and also declares the event type the custom event will use:
sends EventId : EventType;
...where EventId is a string value that is added to the Events namespace, where it can be found under the same name, and EventType is the event class type that is registered with the new event ID. In our case, Events.CreateObject equals the string "CreateObject", which is registered with the event type NadaEvent.
(NOTE) Why Use sends? It's not strictly necessary to register custom events with sends. So why bother? There are two main benefits. The first is that they will show up in code completion, saving you from time-consuming typos. The second is that it allows you to use event connection auto-complete functionality just like any other event. That is, if you type Zilch.Connect(this.Owner, Events.MyEvent, in a function and press the Tab key following the comma after the second argument, the event connection code will complete itself, and a callback function will automatically be generated directly beneath the function scope the connection is made in.

Dispatching Custom Events
The next relevant line is where the CreateObject event is dispatched:
this.Owner.DispatchEvent(Events.CreateObject, NadaEvent());
Let's look at the DispatchEvent function's parameters.
| Sample Value | Parameter Type | Description |
|---|---|---|
Events.CreateObject |
string | The event identifier |
NadaEvent() |
NadaEvent | The event to be dispatched |
This function dispatches an event to this.Owner. Dispatching events to this.Owner is a common way for one component to communicate with other components on the same object. In this case, we're dispatching a NadaEvent with the ID Events.CreateObject.
Before creating the component that will connect to this event, we need to create a projectile archetype that can be spawned as long as the key to create an object is down.
- Command : CreateSprite
- In the
Properties Window - Rename Sprite object to
Projectile - Set Archetype to
Projectile - Under transform
- Set Scale to
[0.35, 0.35, 0.35]
- Set Scale to
- Under Sprite
- Set VertexColor to
[R:0, G:255, B:0, A:1.00] - Set SpriteSource enum to
Circle - Add Component : SphereCollider
- Add Component : RigidBody
- Upload to Archetype

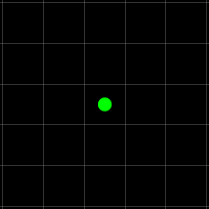
The completed Projectile object
Now we can create the component that will spawn and set the velocity of the object from the player when it "hears" the SpawnObject event.
Responding to Custom Events
- Command : Add Resource
- Create a NadaScript resource using the Component template template and name it
SpawnObjectWithVelocity - Update the
SpawnObjectWithVelocityscript to the following:
class SpawnObjectWithVelocity : NadaComponent
{
  [Dependency] var Transform : Transform;

  [Property]
  var ArchetypeToSpawn : Archetype = Archetype.Projectile;

  [Property]
  var Direction : Real3 = Real3.XAxis;

  [Property]
  var Speed : Real = 25;

  function Initialize(init : CogInitializer)
  {
    Zilch.Connect(this.Owner, Events.CreateObject, this.OnCreateObject);
  }

  function OnCreateObject(event : NadaEvent)
  {
    var obj = this.Space.CreateAtPosition(this.ArchetypeToSpawn, this.Transform.Translation);
    obj.RigidBody.Velocity = this.Direction * this.Speed;
  }
}
- Select : Player object
- In the
Properties Window- Add Component :
SpawnObjectWithVelocity
- Add Component :
In the Initialize function, we connect to the CreateObject event just like any of the built-in events we've connected to previously.
We also need to add our DestroyOnCollide component to the enemy so that the projectiles will destroy it.
- Select : Enemy object
- In the
Properties Window - Add Component :
DestroyOnCollide - Command : PlayGame
- Hold key the
Spacebar to fire

Well, that didn't behave how we wanted it to. Here's what happened: first, the projectile was spawned at the player's position. Then, since both player and projectile have colliders, they collided. In response to the CollisionStarted event, the player's DestroyOnCollide component caused the player to destroy itself. To fix this, we can make a simple change to our DestroyOnCollide component that will make use of Archetype checking within the OnCollisionStarted callback function. (We'll also make it so that the projectile is destroyed in the process.)
- Update the
DestroyOnCollidescript to the following:
class DestroyOnCollide : NadaComponent
{
  [Property]
  var CollisionArchetype : Archetype = Archetype.Projectile;

  function Initialize(init : CogInitializer)
  {
    Zilch.Connect(this.Owner, Events.CollisionStarted, this.OnCollisionStarted);
  }

  function OnCollisionStarted(event : CollisionEvent)
  {
    if(event.OtherObject.Archetype == this.CollisionArchetype)
    {
      this.Owner.Destroy();
      event.OtherObject.Destroy();
    }
  }
}
Now we can check to see what we're colliding with, and whether it's the correct object. If it is, we destroy not only the object with this component, but also the one it collided with.
Select : Enemy object
In the
Properties WindowSet Archetype to
EnemySelect : Player object
In the
Properties WindowUnder
DestroyOnCollideSet CollisionArchetype enum to
EnemyHold key the
Spacebar to fire

Now we can move on to defining your own custom event class, which will allow you to specify and set the data to be sent with the event.
Custom Event Classes
Sometimes it's necessary to create your own custom event class that contains data relevant to the situation in which it's dispatched. To demonstrate this, we'll create an event class that contains a data member that determines whether the created object should move fast or slow.
To start, we need to define our own event class that inherits from NadaEvent.
- Add the following to the top of the
CreateObjectOnInputscript:
class ObjectCreationEvent : NadaEvent
{
  sends CreateObject : ObjectCreationEvent;

  var ObjectShouldBeFast : Boolean;
}
Note that this custom event class uses the sends keyword, registering CreateObject as the event name for a custom event. Previously, this appeared in the CreateObjectOnInput class, where it registered that same event ID with the NadaEvent class. (Now that we're changing CreateObject to use this new ObjectCreationEvent class, we should remove the sends declaration from CreateObjectOnInput.) Now let's update the CreateObjectOnInput component to use the new event type.
- In the
CreateObjectOnInputscript - Update the
CreateObjectOnInputclass to the following:
class CreateObjectOnInput : NadaComponent
{
  [Property]
  var CreateObjectKey : Keys = Keys.Space;
  [Property]
  var FastObjectKey : Keys = Keys.Shift;

  var CooldownTimer : Real = 0;
  var CooldownDuration : Real = 0.25;

  function Initialize(init : CogInitializer)
  {
    Zilch.Connect(this.Space, Events.LogicUpdate, this.OnLogicUpdate);
  }

  function OnLogicUpdate(event : UpdateEvent)
  {
    this.CooldownTimer -= event.Dt;

    if (this.CooldownTimer <= 0)
    {
      this.CooldownTimer = 0;

      if (Zilch.Keyboard.KeyIsDown(this.CreateObjectKey))
      {
        var objectCreationEvent = ObjectCreationEvent();
        objectCreationEvent.ObjectShouldBeFast = Zilch.Keyboard.KeyIsDown(this.FastObjectKey);
        this.Owner.DispatchEvent(Events.CreateObject, objectCreationEvent);

        this.CooldownTimer = this.CooldownDuration;
      }
    }
  }
}
We've removed the sends declaration, since we've moved it to the ObjectCreationEvent class. Also, instead of calling DispatchEvent with an unnamed instance of NadaEvent created right on the spot inside the function call, we create objectCreationEvent, an instance of our new event class. We set ObjectShouldBeFast to equal Zilch.Keyboard.KeyIsDown(this.FastObjectKey). The result is that if the FastObjectKey is down, the object will be fast.
Now that we have our new event and have dispatched it, we'll need to update the component that is listening for the event.
- Update the
SpawnObjectWithVelocityscript to the following:
class SpawnObjectWithVelocity : NadaComponent
{
  [Dependency] var Transform : Transform;

  [Property]
  var ArchetypeToSpawn : Archetype = Archetype.Projectile;

  [Property]
  var Direction : Real3 = Real3.XAxis;

  [Property]
  var SlowSpeed : Real = 10;
  [Property]
  var FastSpeed : Real = 25;

  function Initialize(init : CogInitializer)
  {
    Zilch.Connect(this.Owner, Events.CreateObject, this.OnCreateObject);
  }

  function OnCreateObject(event : ObjectCreationEvent)
  {
    var obj = this.Space.CreateAtPosition(this.ArchetypeToSpawn, this.Transform.Translation);

    if (event.ObjectShouldBeFast)
      obj.RigidBody.Velocity = this.Direction * this.FastSpeed;
    else
      obj.RigidBody.Velocity = this.Direction * this.SlowSpeed;
  }
}
Notice that the parameter for OnCreateObject is now of type ObjectCreationEvent instead of NadaEvent. The parameter for an event callback function must always match the type of event it is responding to. The event argument is then used to access the Boolean data member, which determines the speed of the object that is spawned.

Related Materials
Tutorial
Manual
- commands
- launchernewproject
- resourceadding
- selectobject
- keywords
- Upload to Archetype
- addremovecomponent
Reference
Classes
Commands
Events
Nada Base Types
Development Task
- T1281